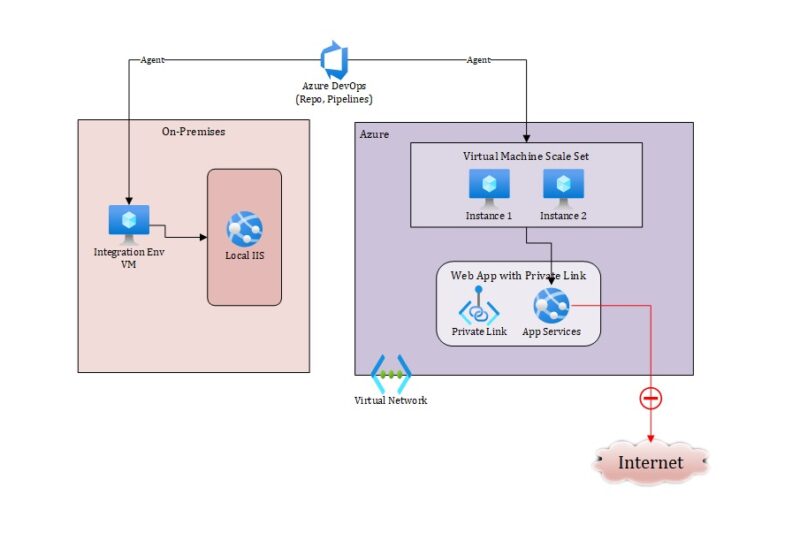
Recently I came across a requirement in which one of my teams had to deploy some code to servers hosted on AWS using Azure DevOps. Initially, it looked like not an issue as many articles are there explaining how to deploy solutions on AWS servers using Azure DevOps. However, there was a catch, none of those AWS servers were exposed over internet, i.e. there was no public IP assigned! And of course the servers were behind a firewall, essentially similar to any on-premise environment.
To make things even more interesting, the solution required to be deployed had a mix of .Net code output, PowerShell scripts, Text files etc. Essentially what my team wanted was to somehow copy some files from the output to a server behind firewall.
Initial Findings
Some initial googling took me to this video, which showed the way forward. What this series explains is how we can create Deployment groups and use various Release Pipelines tasks to deploy to those deployment groups. And crucially that the servers of the deployment group can reside behind a firewall. So, I decided to give it a try using my personal laptop.
Hello World
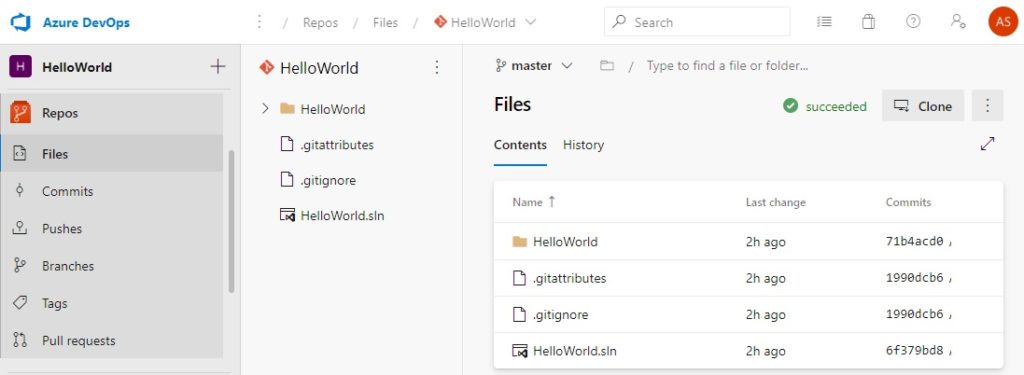
First step was to create a Hello World console application and add it to Azure DevOps repository. This article is not about that, so I will skip the details. Of course, you will connect with your own code repository.
Azure DevOps Build Pipeline
To build the hello world solution and check if how the output files can be extracted, I built a really simple build pipeline. All it essentially does is to compile the solution in release mode and copy the output files in a drop folder. The idea is to be able to move these final output files to my laptop using Azure DevOps!
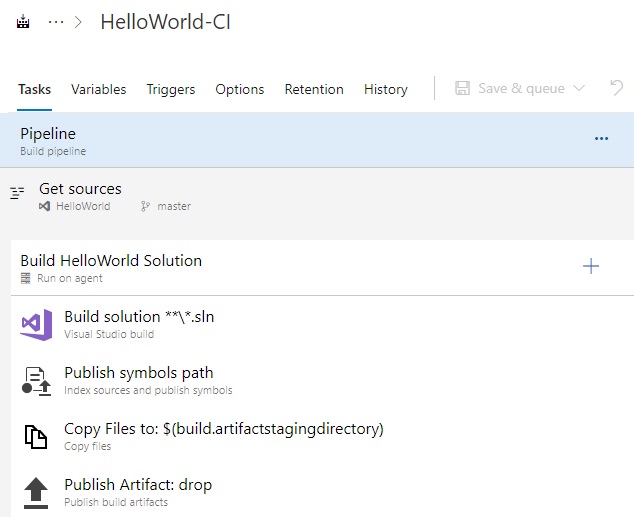
Just create the pipeline, configure it and run to get the output files. Again, skipping the details here, so that we can focus on actual deployment part.
Azure Deployment Groups
Now the actual fun starts. This is the first step which will allow us to finally copy/deploy the output files to any server(s) behind any firewall, as long as those servers can reach internet. So, let’s get started.
Create Local Account
Before we jump in to do anything with the deployment groups, we need one account which has permission on the on-premise server. For domain connected servers it could be a domain account, I just created a local account on my laptop. We need this account later while configuring the Deployment agent. So, note down the username and password.
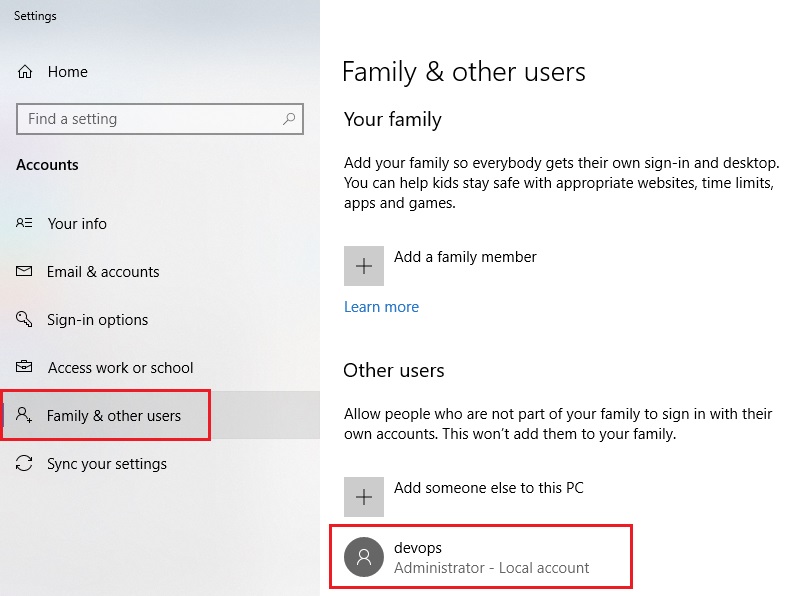
As you can see from the screenshot above, I tested this on a windows 10 laptop, so you can actually target any machine regardless whether it’s running a windows server or not.
Create Deployment Group
Now that we have our local account, let’s go ahead and create a deployment group. Click on Deployment groups under Pipelines in your DevOps project and click on “+ New”.
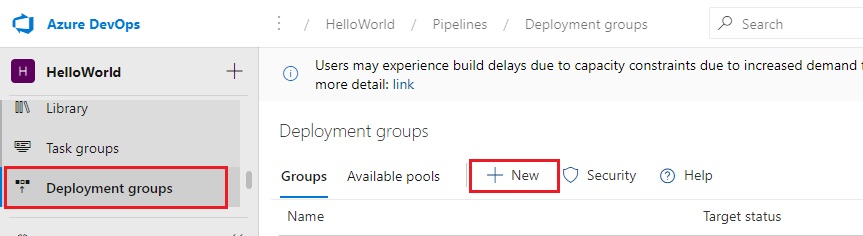
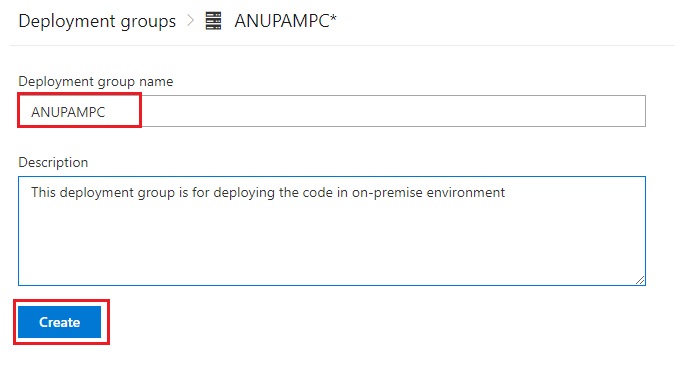
It will open up a form – fill in the name of the deployment group and some description, if you want, and click Create.
This action will create the deployment group and give you a screen with a PowerShell script pre-filled. This script will be used on the on-premise server to install an agent which facilitates the deployments from Azure DevOps. Click on Copy script to the clipboard.
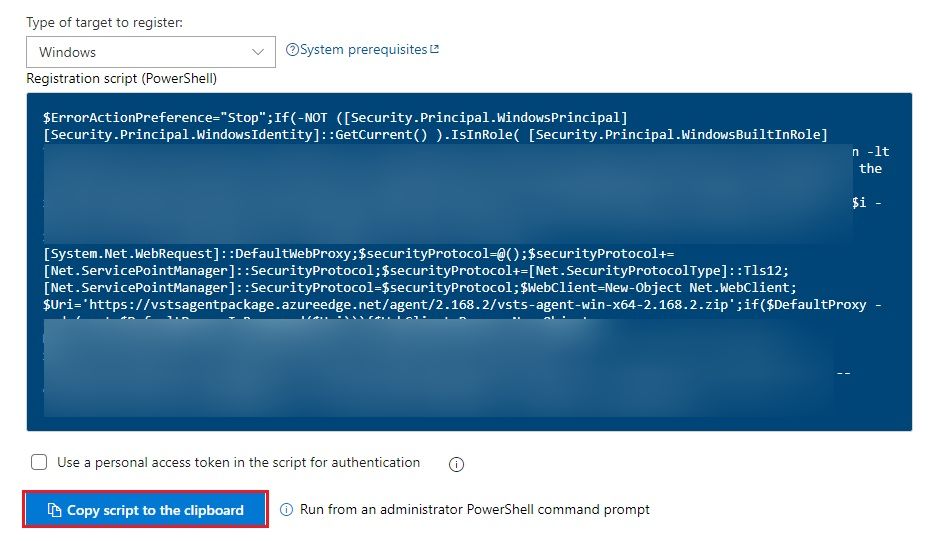
At this stage our deployment group is created but not online yet.
Configure Agent on On-Premise Server
The script we copies in previous step needs to be executed on the On-Premise Server. Open a PowerShell window as an administrator, paste the script and run it.
It will prompt for a couple of parameters, like if you want to use tags or not and the local account credentials, which we created earlier.
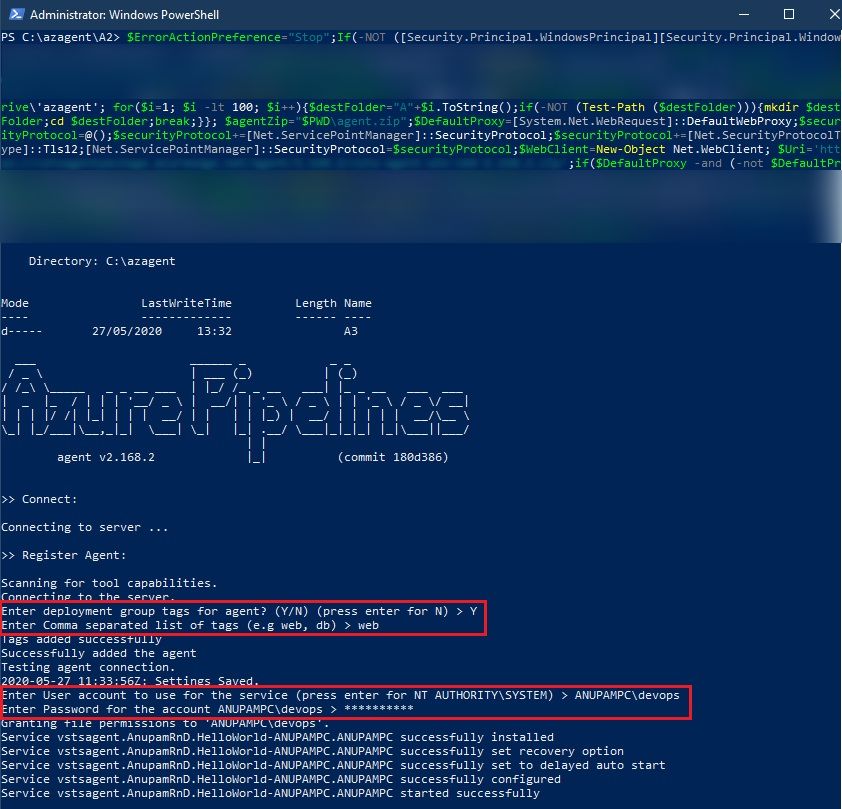
If everything goes well, you should see the screen similar to above with a successful message.
You can also verify the successful installation by looking in to C: drive. You should find a folder named “azagent” created. Also, In task manager you can see a background process “Agent.Listener” running.
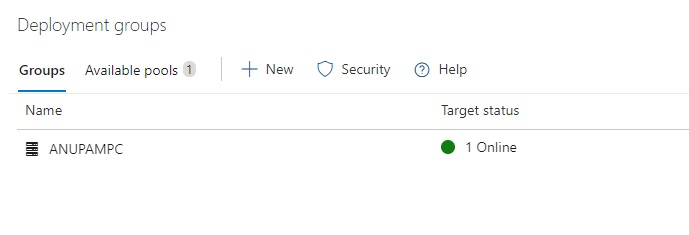
At this stage, our deployment group creation gets completed and now if you go and check the status of the deployment group in the Azure DevOps, it should show as Online.
Release Pipeline
Now that we have the deployment group agent running on the on-premise server, let’s go ahead and create a release pipeline and try to deploy our hello world app.
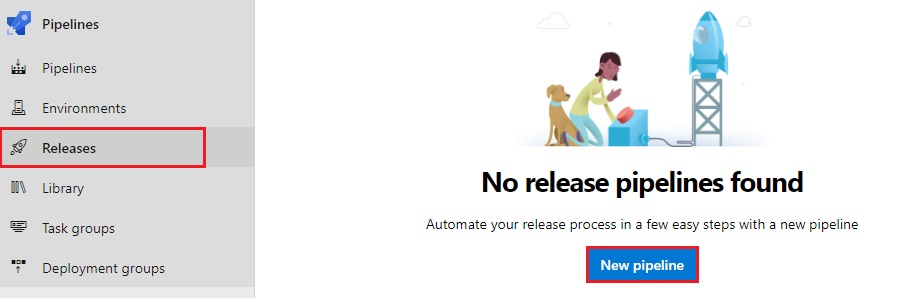
Create Release Pipeline
Click on Releases under Pipelines in your Azure DevOps project and then click on New pipeline.
It will show another screen with Artifact and Stages. Let’s just add an Empty Job to the stage to get started, we will configure this step later.
Give a nice name to the stage. Since we are just going to copy the output files from DevOps to the on-premise server, we’ll be using just this step.
Now, configure the Artifact. Since we need to deploy from the Build pipeline, just select the build and then select the source from the build pipeline dropdown. You don’t need to select any other options, as they will get pre-filled.
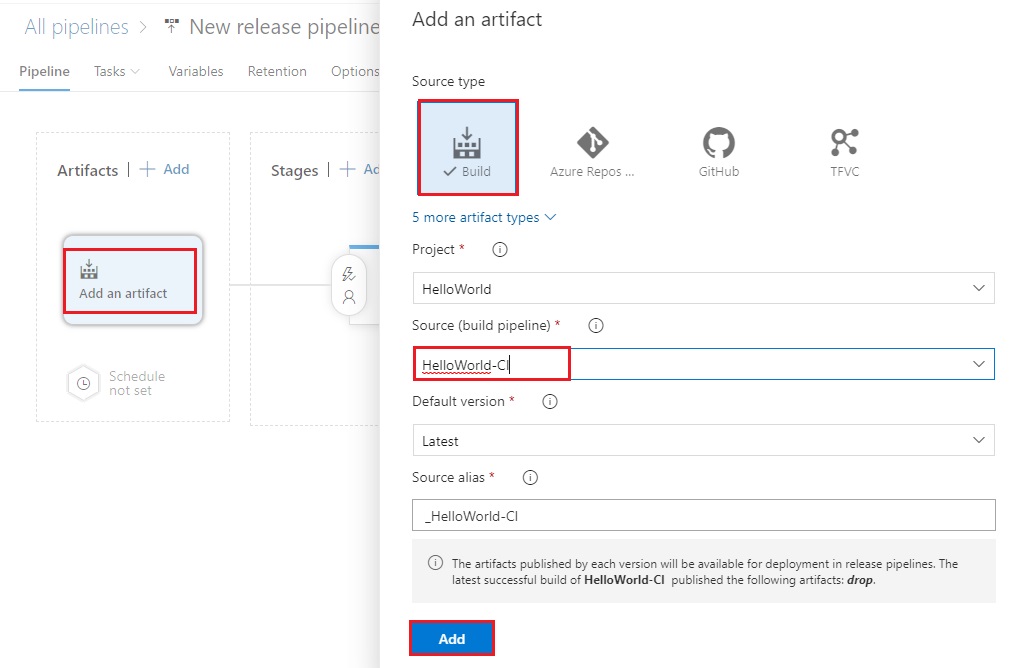
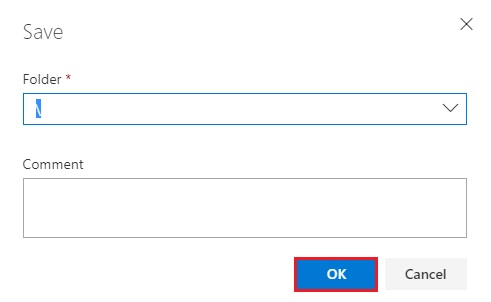
Click on Add, give it a nice name and then Save the Release Pipeline.
You will get another popup to specify the location, just go ahead and click OK.
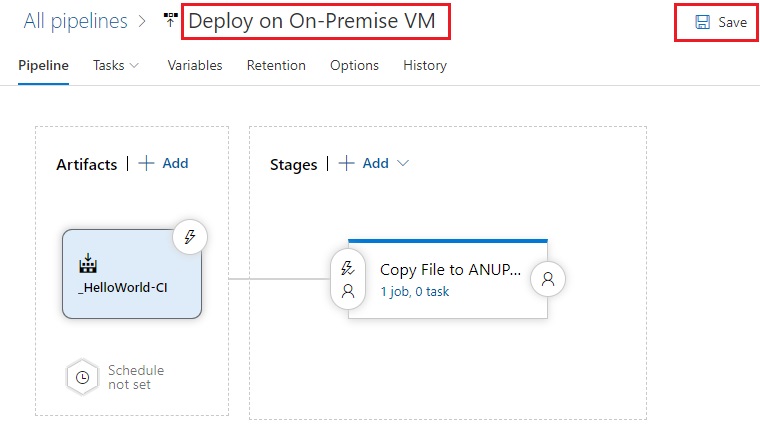
At this stage our release pipeline is ready, but not fully configured yet.
Configure Deployment Stage
We need to still configure the stage and tell it what and how to perform the deployment. To do so, click on the link in the stage
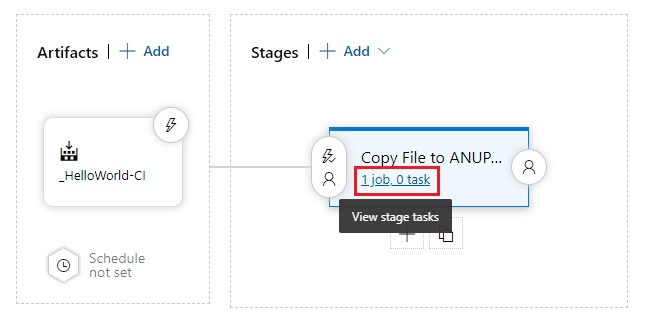
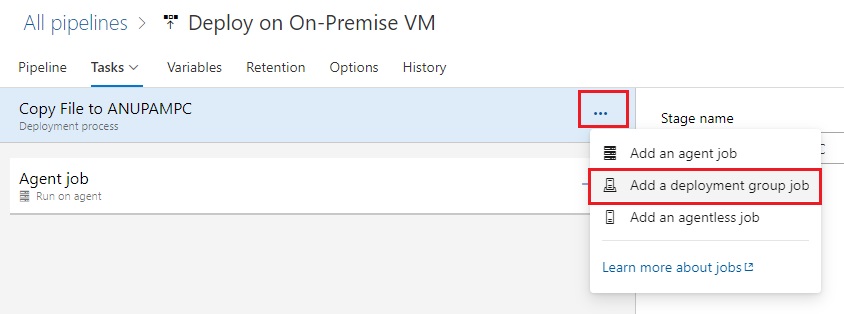
It will open up another screen where we’ll be configuring tasks for deployment. Since we are going to do deployment for our deployment group, click on the “…” and select “Add a deployment group job”.
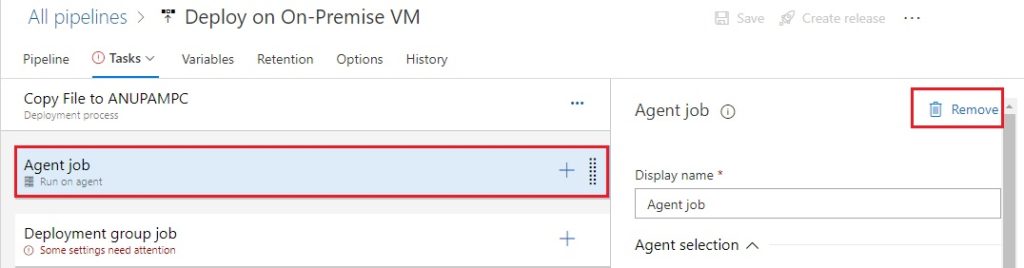
You can then get rid of the “Agent job” that gets created by default.
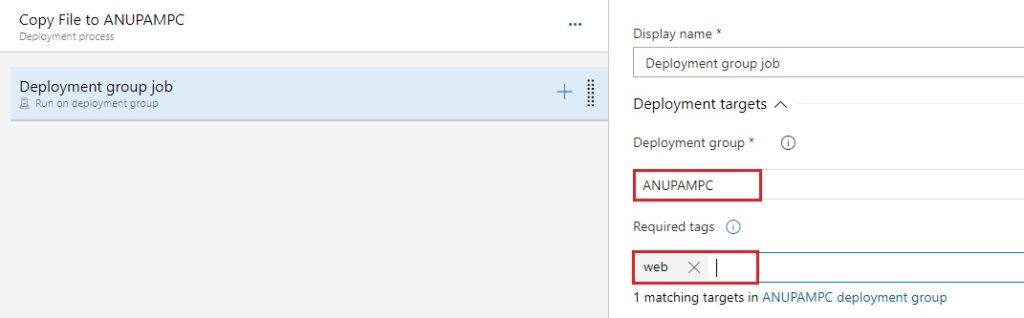
Now, we’ll configure the newly added Deployment group job. Just click on it and then select the Deployment group you created earlier – ANUPAMPC in my case. I had also created the tag when running the script on my laptop, so I selected it too, but it doesn’t matter for a single server deployment.
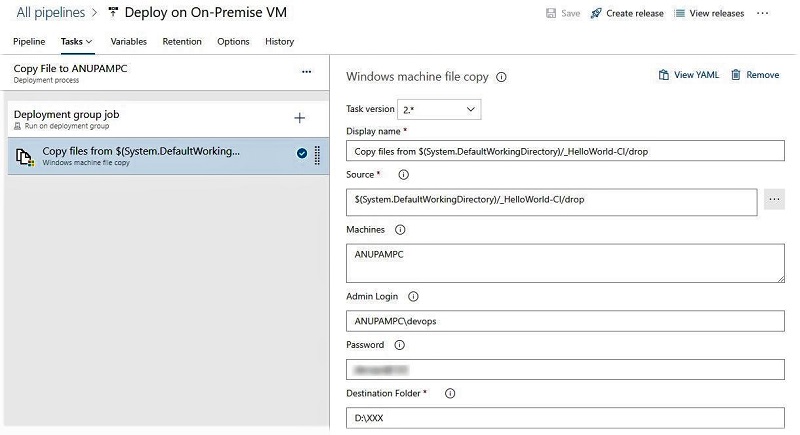
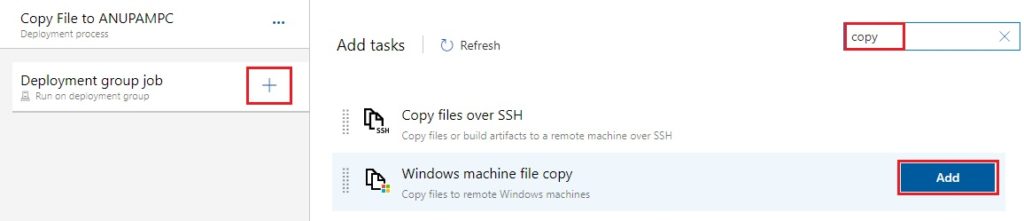
Now, we are going to add a Windows machine file copy Task. Just click on the “+” icon on the deployment group job and search for Copy and click Add on the Windows machine file copy.
Once added, we need to configure this newly added task. This task expects the highlighted inputs. Just select the output folder from the build output as source. Under Machines, you can provide either the on-premise server name (FQDN) or even internal IP address. If you have to deploy on more than one server, provide a comma separated list of machine IP addresses or FQDNs. Type in the local credentials created earlier on that on-premise server and finally the destination folder where the output files should be copied.
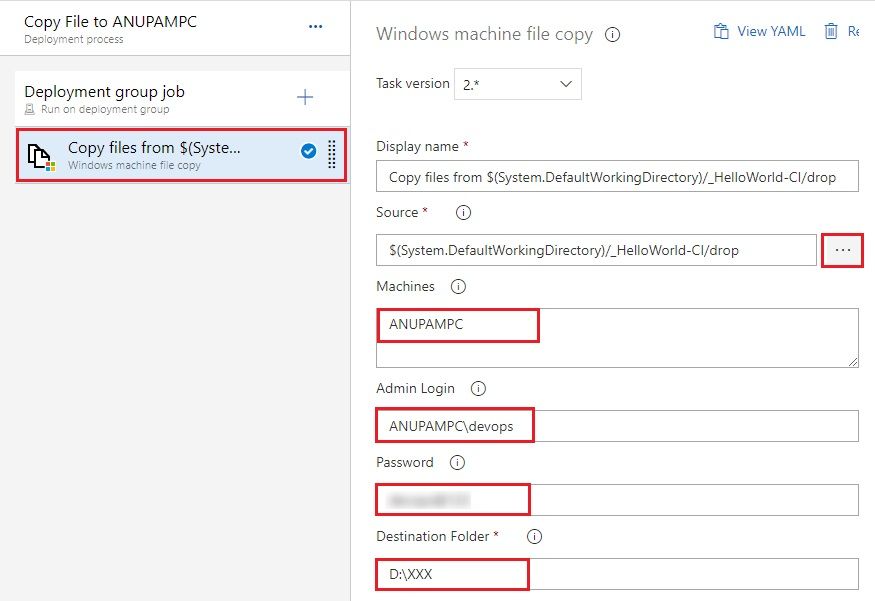
ANUPAMPC is the name of my laptop in this case. Even though it’s same as the deployment group name, you have to provide the machine name here, not the deployment group name
After all the details are filled, save the form.
Create Release
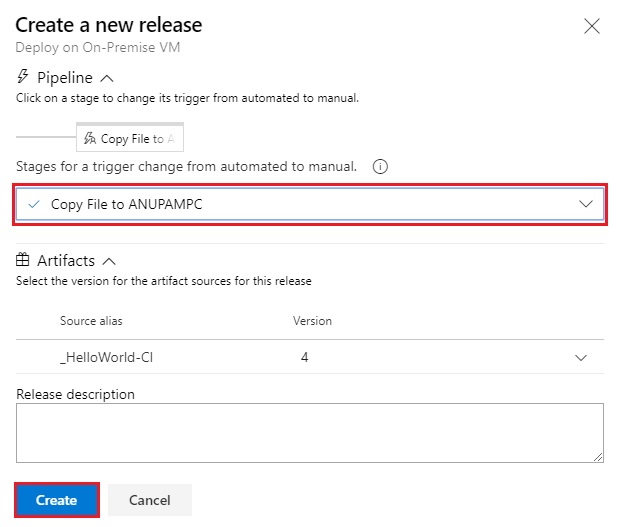
Now that our pipeline is ready, let’s create the release. Just click on Create release on the screen

It will open up the form asking to select the stages for which you want to change the trigger from automated to manual. A manual deployment will be required for these stages. Since we only have one stage, it doesn’t matter, just select the stage and click Create.
Deploy Release
We are almost there, hang on. Now our release is ready to be deployed. Click on the newly created release from under your release pipeline.

And click on Deploy under the Stage.

This opens up another window, where you can write some comments about this run, if you want. Just click on Deploy again here.
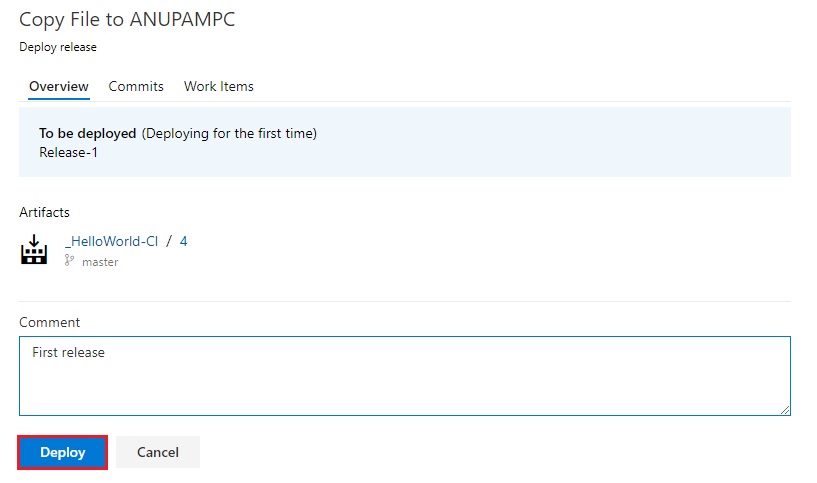
This starts the actual deployment – In this case, copying the output files of Hello World application to my laptop!
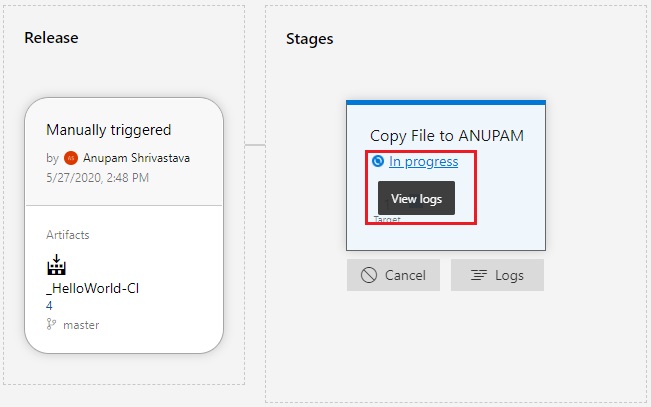
Monitor Progress
You can monitor the deployment progress by clicking on the In progress link. It shows up all the output and is very handy specially in case of any errors. You can then analyze the errors, work on those and rerun the release.
Success!
This is what we have been waiting for! If all goes well, you will be presented with this screen showing that the deployment job has been completed successfully.
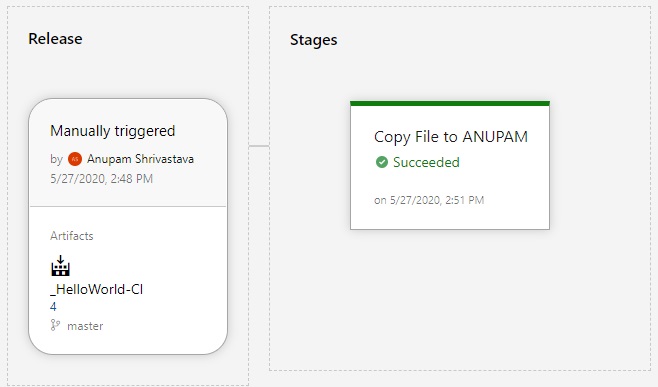
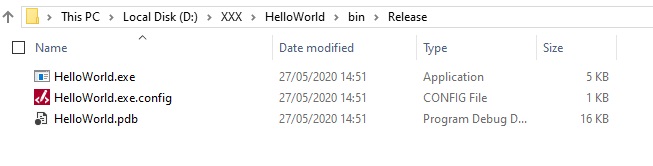
Now you can take a look at the On-Premise server as well, and you should find all the out files successfully deployed.
And we are done!
I really like how easy Azure DevOps has made it to deploy various solutions almost anywhere. Of course you have a large set up pre-defined templates available to deploy various different types of targets like IIS, Azure functions, etc. This was just a simplistic example of how you can make use of Azure DevOps to deploy solutions across firewall protected on-premise environments as well.
Hope this helps.
Enjoy,
Anupam

4 comments
Super and Simple Article – please write more like this
Can only agree with the previous commenter. Great article! Thanks for taking the time sharing this.
very nice article Sir. That’s what I was looking for a long time and finally get here Thank you so much…
Excellent article, it is of a great value, thank you sooo mucho for taking your time and share you knowledge, it is very inspiring!