As the Microsoft Teams usage grows, so does the number of teams workspaces and list of members in each of those. Users quickly started to look for ways to just refer a smaller subset of the all the members of a team/channel.
Recently, Private Teams Channel feature was rolled out and that served some purpose, but I see that doing more harm to actual “collaboration” then helping it. Mostly because many business users just started to create private teams to isolate their sub teams even though the purpose was just to ensure that larger team doesn’t get bothered with unrelated content and discussions. But it ended up creating another island where content and knowledge just get stuck.
Concept of Tags in MS Teams
Here comes Tags in Microsoft Teams to rescue us from the above mentioned situation. The concept is simple, you can just “Tag” a set of members with one or more identifiable keywords and later just refer those tags to call out/mention all the associated members within specific Team’s channels. Even though all the members will see the content being posted, only the tagged members will get a notification about the post.
Tenant Level Configurations
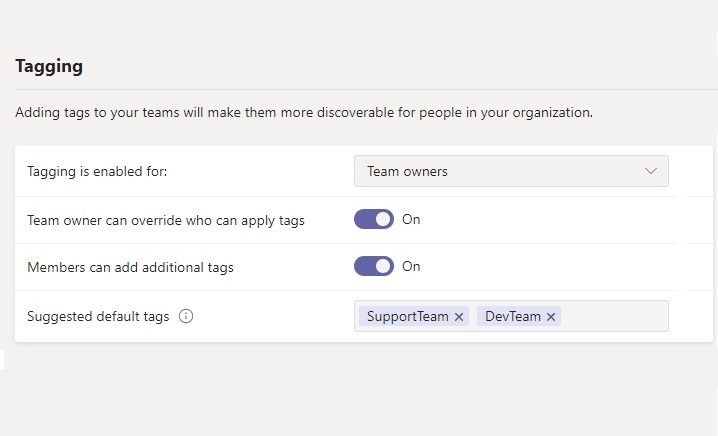
To get started with Tags, we need to first ensure it’s enabled at the tenant level. We can also configure a couple of setting there.
Go to the Teams Admin Center and click on Teams settings from under Org-wide settings.
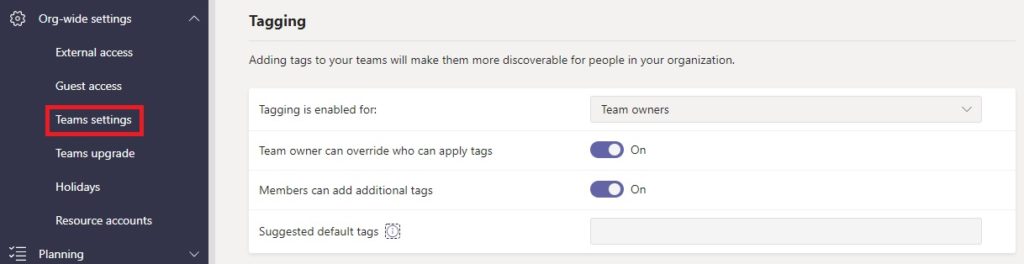
At this screen, you can make a few configuration settings.
- Tagging is enabled for: Here you can configure the target audience for the tagging. The options are Disabled, Team owners & Teams owners and members
- Team owners can override who can apply tags: Switching on this option, gives the control to individual Team owners of respective teams workspaces to change the above configuration at individual Team level
- Members can add additional tags: Enabling this option provides the feature to individual team members to add additional tags in their corresponding teams
- Suggested default tags: Tags that will be suggested when a team member adds a tag to a chat. You can have a maximum of 25 tags and each tag can contain a maximum of 25 characters. If members can add additional tags option is disabled, then they can still select from this default tags list. Strangely, here you can’t add tags which has spaces in between (like ‘Office 365 Team’) , but you can create such tags from within Teams… funny!
Select and configure the options as desired in your environment. At this stage, our tenant level configuration is complete. Let’s head to a Team workspace and take a look at how can we play with tags there.
Tags in Individual Teams
Once the Tags are enabled at tenant level, this feature becomes available to be used in all teams. However, if the option “Team owners can override who can apply tags” was enabled at the tenant level, then individual team owners can also change this from within Teams settings.
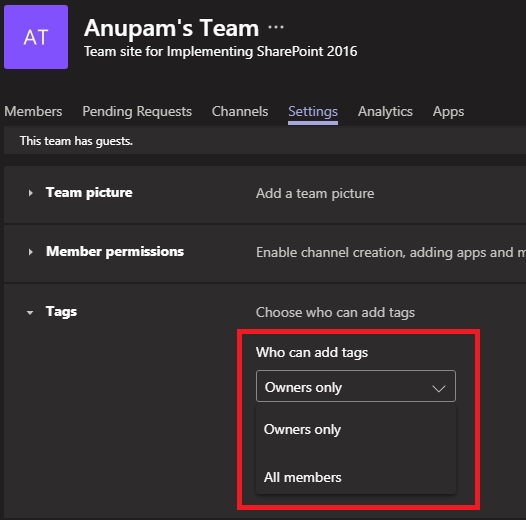
Note that Teams owners can’t disable tagging in individual teams, only limit who are allowed.
Create Tags
There are a couple of ways to start creating tags. The best way to start creating tags and associating members is to start from the Teams workspace’s context menu. Go to your team, click on the content menu (…) and click on Manage tags

If this is the first time you are going to create any tag, you will be greeted with this nice message screen.
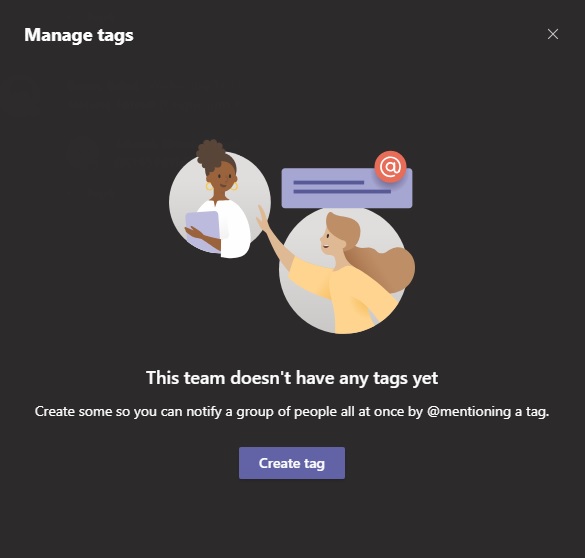
Go ahead and click on the Create tag button on this screen to open the screen where we can specify the tag name and associate members.
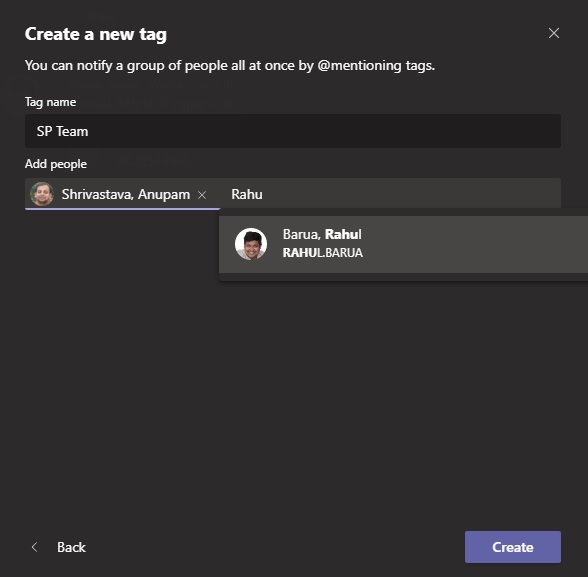
Give a nice relevant and identifiable name under Tag name and select the members who you want to associate with that tag. The people picker will suggest only the members of the current Team workspace. Click on Create to create the tag and complete the association with members.
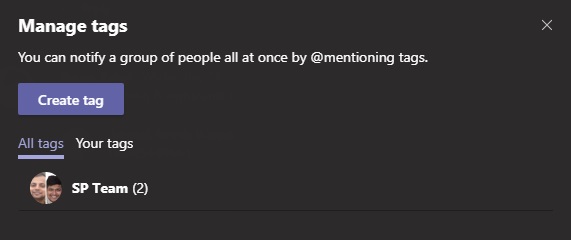
You will get this nice screen showing your Tags. You can repeat the above process to create additional tags and associations. On this screen you can also see tags created by other users and filter on only tags created by you by clicking on ‘Your tags’ tab.
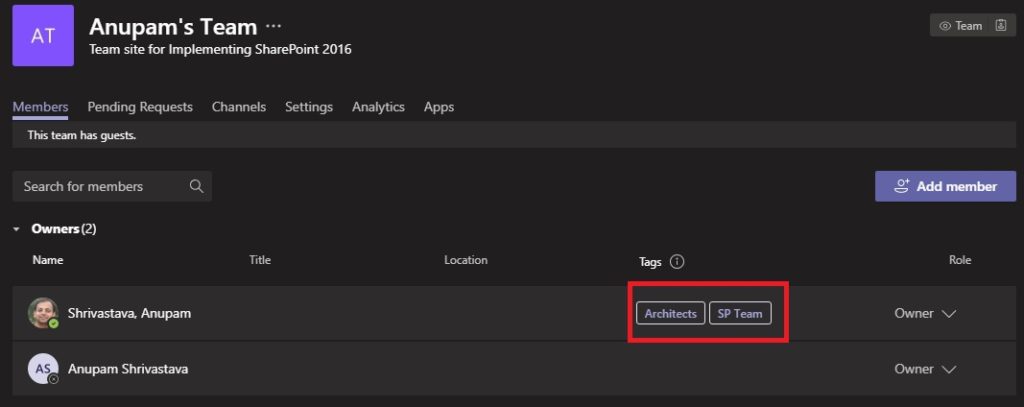
Create/Manage Tags from Members Interface
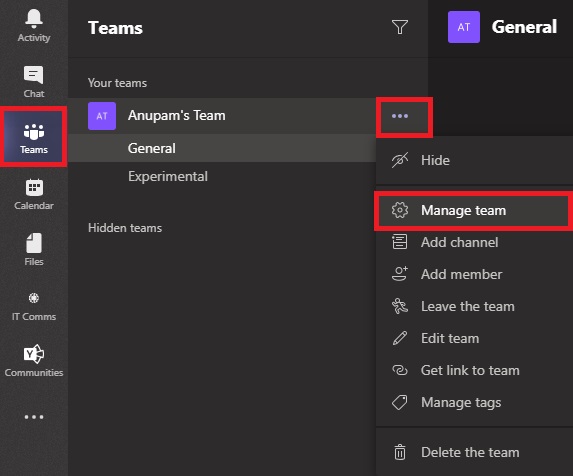
Another way to create tags and manage them is from the list of members. Go to your team, click on the content menu (…) and click on Manage team.
If you had already created a tag using previous approach and associated some members, the members screen would show up the tagged members. You can also add new tags from this screen, by clicking in the highlighted icon and typing in the tag name.
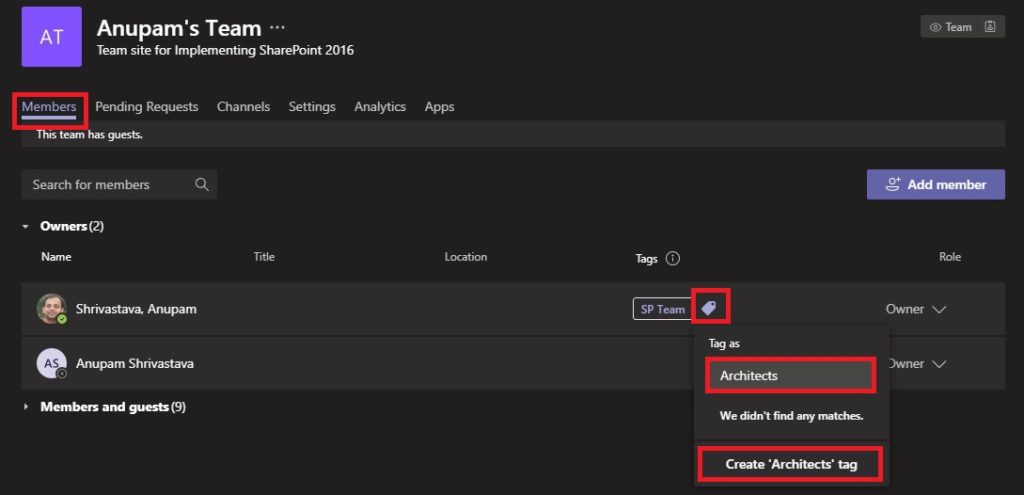
When you click on the Create ‘xxx’ tag, you could see the selected member gets tagged with both the tags.
A team can have up to 100 tags, up to 100 team members can be assigned to a tag, and up to 25 tags can be assigned to a single user.
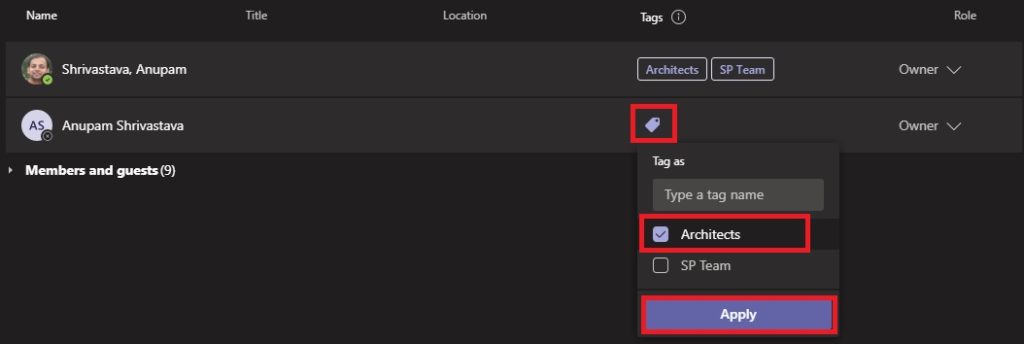
Assign Existing Tags
So, what if you ended up creating a number of tags and need to assign those to some new/existing team members? Easy peasy, just click on tag icon next to that member, and it will show up all the tags available for the team, select all that are relevant and click Apply.
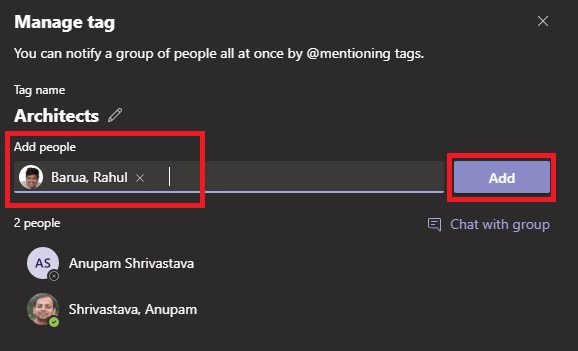
And ofcourse this can be done using the Manage tags option as well, in case you have a large number of such members. To do so, just click on the tag icon and then click on the Manage tags option.
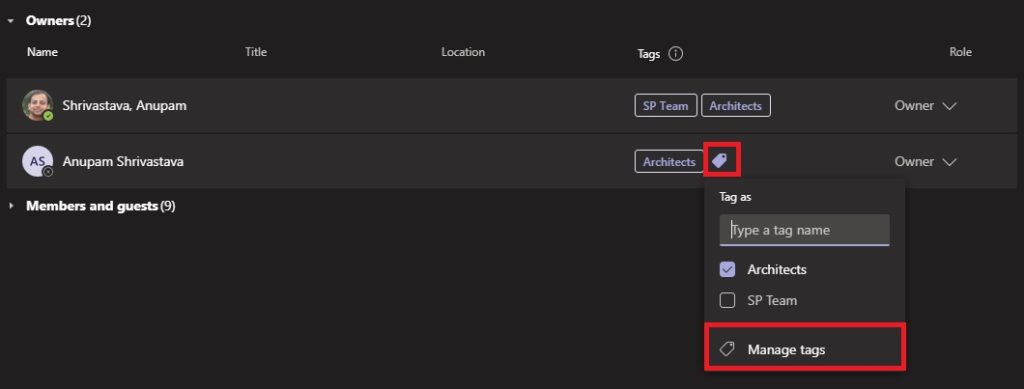
It will take you back to the Manage Tags screen. Click on the tag to which you want to add additional members
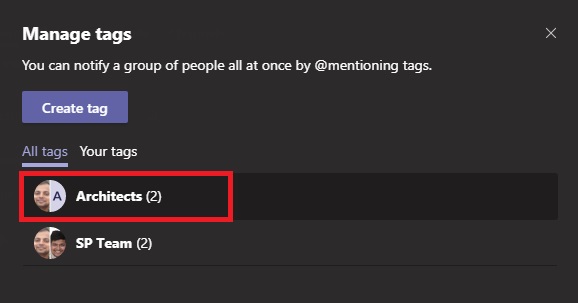
On the screen that opens, you can add a number of team members at once. Search and select all the members and click Add.
Manage Tags
So, we can create new tags and add members there. But what if we want to change the name of the tag?
Well, just head to Manage tag screen. I am sure, you know the ways to find that screen by now. Click on the tag you want to edit and then click on the little edit icon next to it’s name.
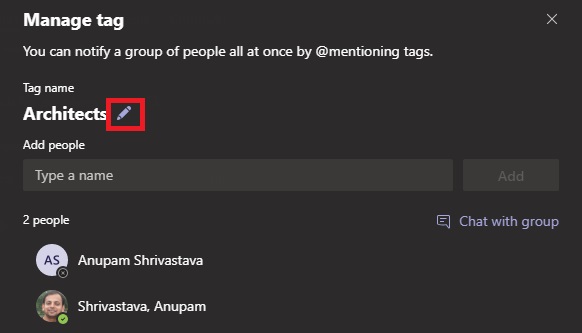
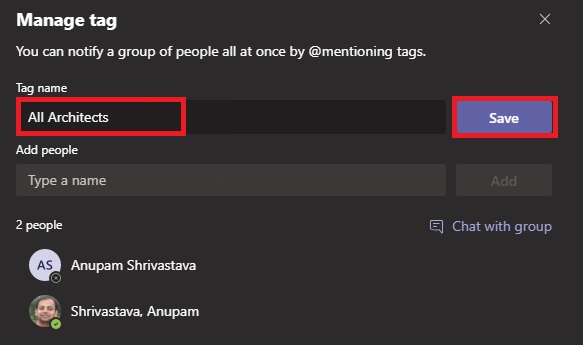
The Tag name will become editable, change the name as desired and click Save. This will update the tag for all associated members.
Delete Tags
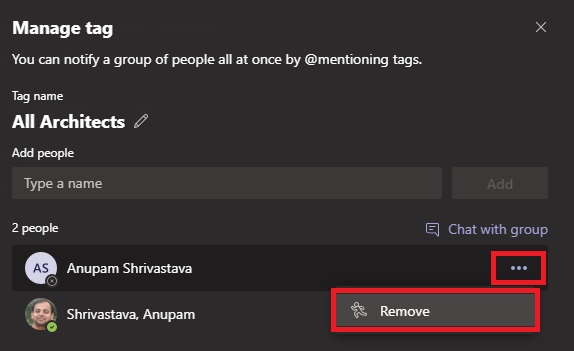
And ofcourse we want to know how to delete tags which those are not relevant. Unfortunately, that’s not as straightforward as add/edit options.
To delete a tag, you essentially need to remove all associated members from it. When the last member gets removed, the tag is deemed to be deleted.
Using Tags
Now that we know how to add, update and delete tags, we need to ask why in the first place we started to do all these. To use those tags, right?
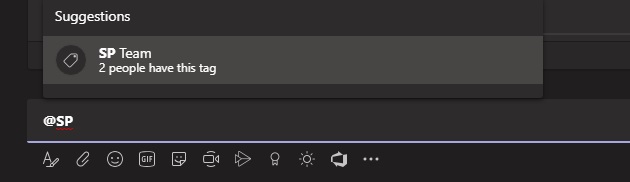
Remember the purpose was to logically group a set of people, so that they can be referred collectively? So, now that there are a number of members associated with identified tags. You can just refer then in different channels as “@tagname”.
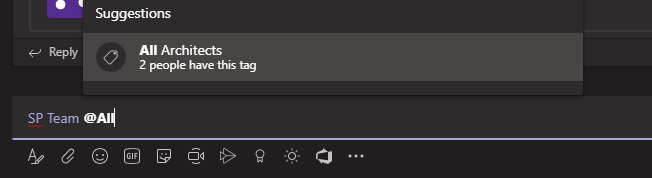
We can also mention multiple tags at once
And when you send this message, the members associated with these tags will receive a notifications like this

Bonus
And as a bonus, you can also start a separate group chat with the members associated with any tag. Just look for the ‘Start chat’ link on the manage tag screen.

I find this tagging really useful and convenient. Go ahead use it, thank me later 🙂
Hope this helps.
Enjoy,
Anupam

2 comments
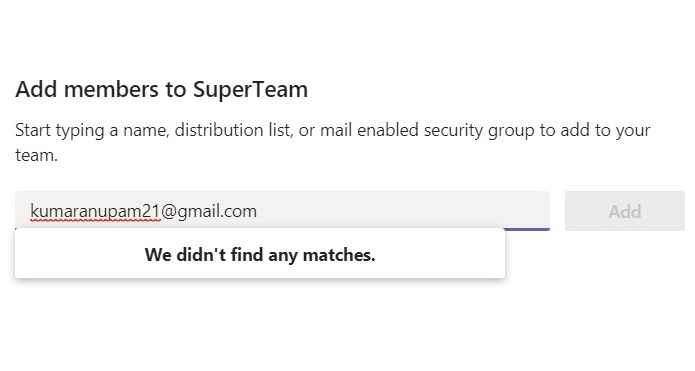
I want to add a tag to 100 people. Is there a way to select ALL and avoid having to type each name when I wish to add the same tag to many members?
It’s not possible using Teams admin interface currently. You can try using this Graph API, which is still in Beta.