One of the most popular articles on my blog is How to Enable Incoming Emails in SharePoint Online, which was written around three years ago! The approach described in that article still remains valid and works well. But I decided to write this article because now we have an even better way to achieve the same. Essentially, this solution avoids the need of a password to be associated with each of the shared mailbox, making them more secure and easier to maintain.
I will skip the background about why we need this, if you are reading this article then probably you know that very well already and rather focus on the changes what we need to do compared to the previous article about this topic.
Microsoft Flow
Our overall approach remains the same. We make use of Microsoft Flow to create a simple flow which will read mails from a Shared Mailbox in Exchange Online, get the attached documents and upload those in the SharePoint Online document library.
Pre-requisites
- An Office 365 account with Flow license assigned
- This account needs to be exchange administrator and user management administrator or Global administrator of the tenant. Alternatively, you can ask an existing administrator to perform the tasks
- A shared mailbox for each document library which needs to be mail enabled (this is where the difference will be compared to last article)
- A service account (kind of a shared account which you can use across multiple shared mailboxes)
- A SharePoint Online Site Collection with Document Library
Create a Shared Mailbox
Our first step is to create a shared mailbox that will be used as a mailbox for one specific SharePoint document library. You can also use any personal mailbox for this purpose, but since Shared Mailboxes don’t require licenses assigned, that’s a better choice.
If your account has exchange administrator permission (or global admin of tenant), then you can follow the steps yourself or ask any admin to do it for you. The steps below are based on the new Exchange Admin Center interface.
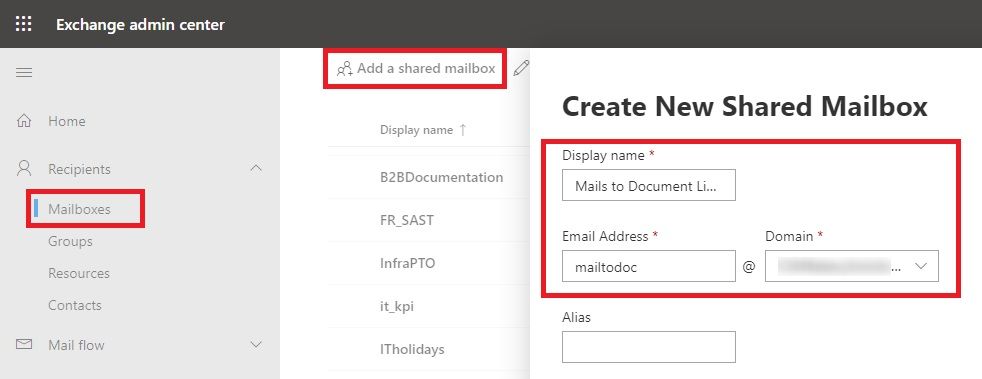
- Go to Exchange Admin Center and select Mailboxes from under Recipients
- Click on Add a Shared Mailbox and Fill in the Display Name and Email ID and click Create.
Now, we have a shared mailbox created on which users will send mails with attachments to store documents in corresponding SharePoint document library. But before we can use it, we need to delegate the permissions a bit to be able to send mails.
Delegate Permissions
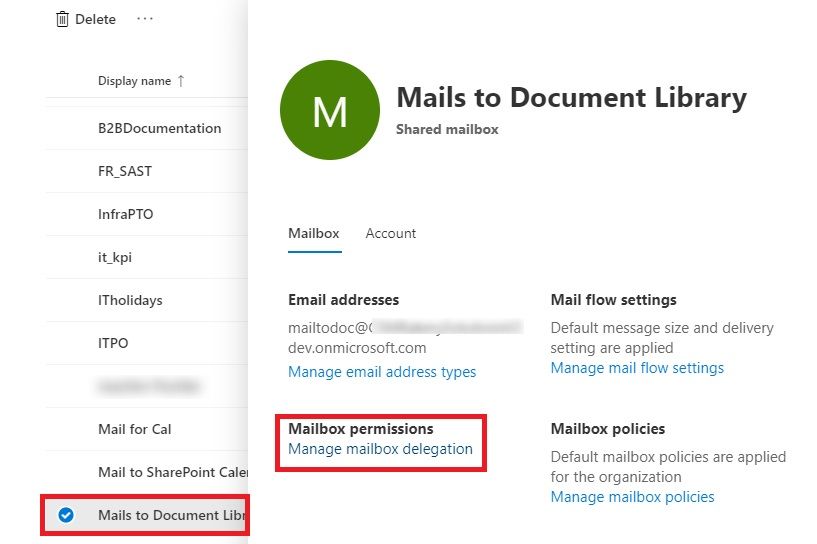
Select the newly created shared mailbox from the list of mailboxes and in the pop up form, click on the “Manage mailbox delegation”
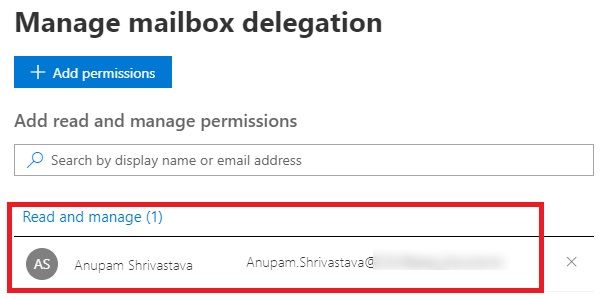
This opens up the Manage mailbox delegation window. Click on Edit button next to “Read and Manage”.
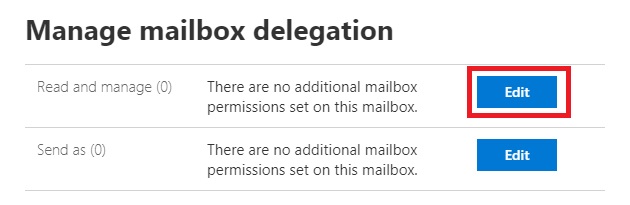
In the next screen, click on Add permission and search for the service account (in this case I am just using my own account, but the idea is that you use an account which can be reused across multiple such Flows) which you will use as connection in your flow, and save it.
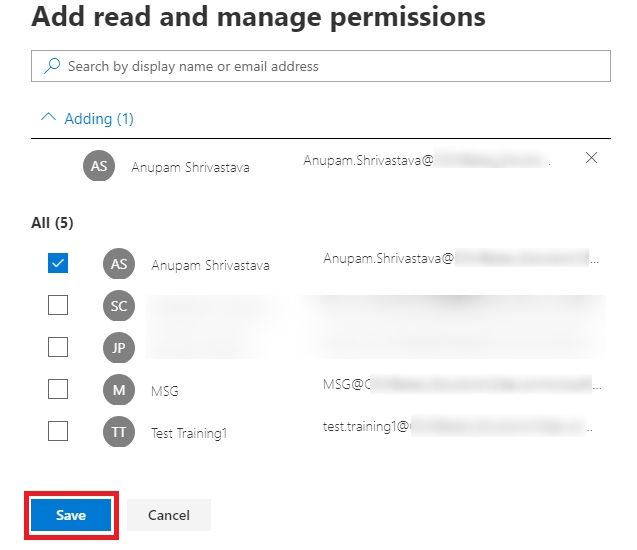
The final screen will look something like this, showing the selected service account has got “Read and manage” permission on this shared mailbox.
Now we are done with the Exchange part, let’s move to create the actual flow.
Create Flow
This is again going to be similar to the previous article, but with a couple of changes.
- Go to Microsoft Flow and login with your Office 365 account. This account need not be the same mailbox account.
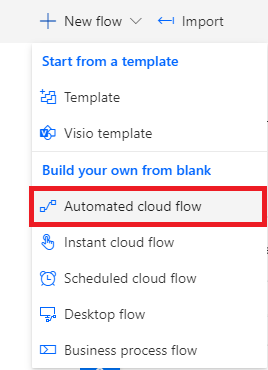
- Click on New flow and then Automated cloud flow. You can use some predefined templates and then chose to modify that but for this article, I am going to avoid that, so it’s better to do it this way.
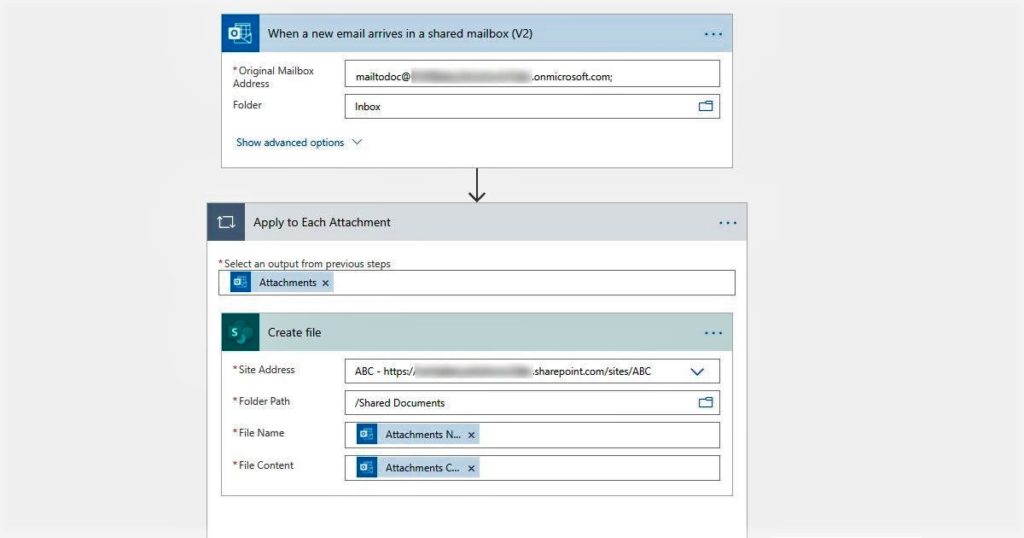
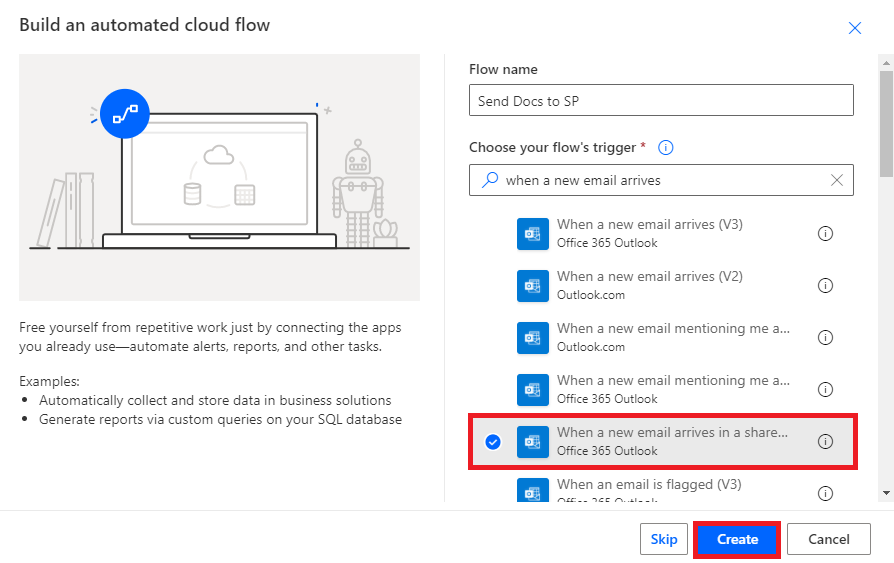
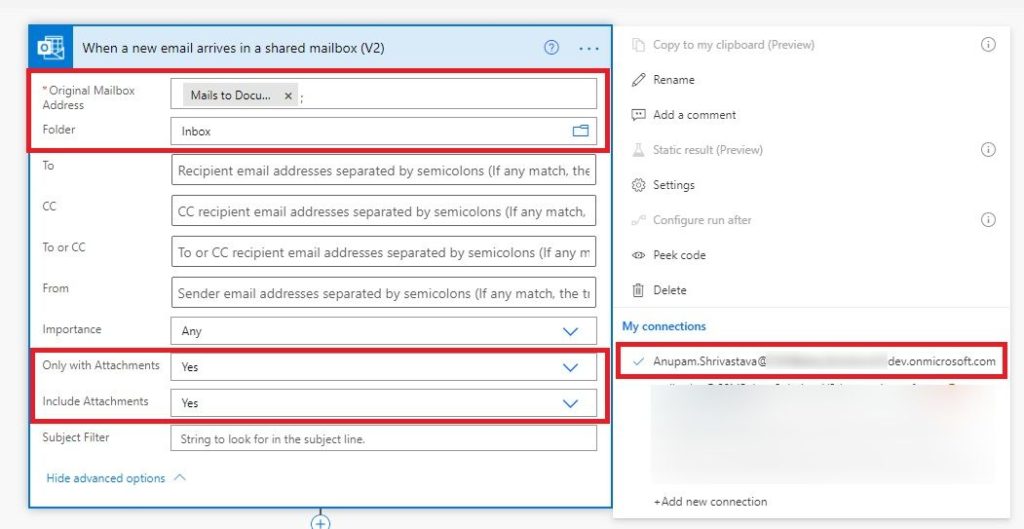
- On the next screen, search for “when a new email arrives”, select the trigger “When a new email arrives in a shared mailbox”, give your flow a name and click on the Create button.
- Add another action “Create File” from under SharePoint

At this stage the flow gets created, but the required fields do not have actual values which we want
Configure Flow
Now comes the important bits.
Configure the trigger with the connection using the “Service Account”. This step is different from the previous article. Now, we don’t need to login with the shared mailbox account, but instead can use a single service account across multiple such shared mailboxes.
Also, type in the shared mailbox id and Attachments options to Yes.
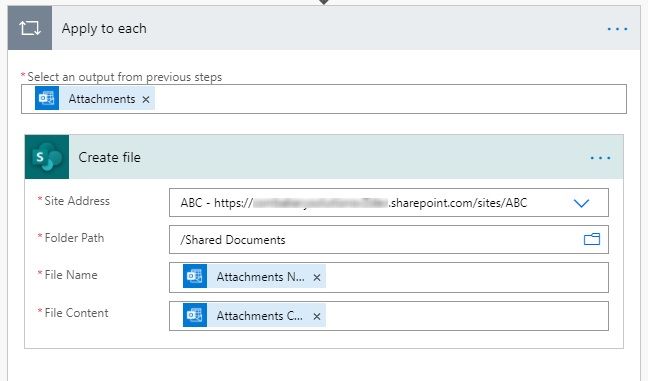
Configure the SharePoint CreateFile action with Site URL and Document Library name. Under FileName, select “Attachment Name”and under File Content, select “Attachment Content” from under the Dynamic content section “When a new email arrives in a shared mailbox (V2)”.
This will add a loop on Attachments automatically, so that it loops through all the attached files in the mail and create those in the target SharePoint library.
And that’s it. Now are flow is configured, enabled and ready to run whenever a mail is received with attachments in our shared mailbox.
Of Course you can add various other types to actions to check errors and filters based on Senders, Subject etc., but this article is just to get you started 🙂
Verification
I will just reuse some content from my previous article, so that you don’t have to go back and forth. Now that all is configured, let’s send a mail to our shared mailbox and see if our flow works as expected. From our outlook or any other mail client just attach a sample document and sent that to the email id of the shared mailbox.

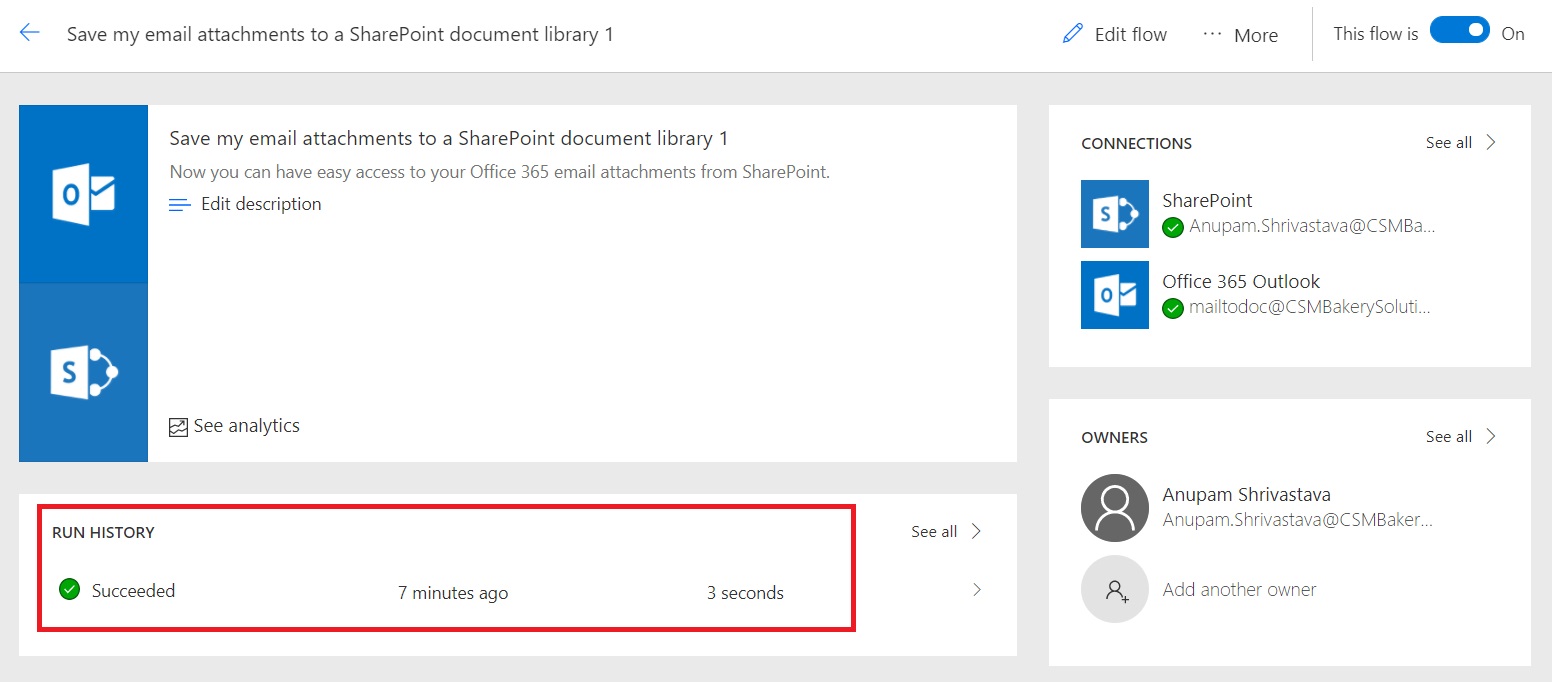
It may take a few minutes, before you can see the flow gets triggered. wait for 5-15 minutes and then check your flow. It should come up as succeeded under Run History.
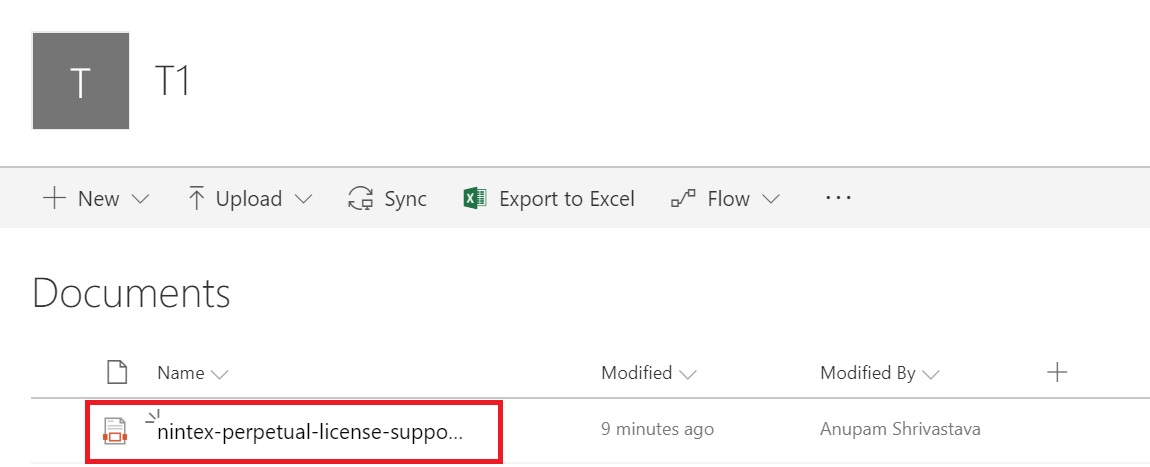
Now, it’s time to look into our SharePoint document library which we had configured in the flow and find out if that attached document was uploaded. You would see the document was uploaded and modified by would appear as the same account under which the flow gets executed.
So, all good. We have a SharePoint document library to which we can send documents via mail. For each such document library, we can create a new shared mailbox and a flow. You can share this flow with your colleagues to make it a Team Flow, so that they can also monitor and manage it.
Benefits over Previous Approach
So, why do things this way when the previous solution still works good enough? The main reason being better maintenance!
- Now, you don’t need to maintain multiple shared mailbox account passwords (and MFA, if enabled)
- This also allows easier troubleshooting incase you want to check if the mails are actually arriving in any shared mailbox, just by using the common service account
- You can actually change your existing Flows created for the purpose of sending documents to SharePoint document libraries easily, by just updating the trigger.
Hope this helps
Thanks,
Anupam

13 comments
This is a great read, but you just brush over the service account part. What permissions are required by the service account to be able to do this as opposed to using your own admin account?
It’s detailed out, including the steps and screenshots, in the article. The service account should have “Read and Manage” permission to the shared mailbox. You will see this option, if you using new Exchange Online interface, otherwise just provide Full Control.
Will this work even the file being send is over the 20mb limit?
SharePoint online doesn’t have 20 Mb limit. If your mailbox can receive larger files, this solution will work.
I want the doc library colimns also be populated when the attachment is sent to the library.
How can I do this?
And how do you plan to send those values? As email body?
You can actually read the mail body also in Flow and use additional logic to update metadata, but that would be tricky as you would be working with free-text type data in mail body.
What happens when attachments with the same name come in? For example I receive a document each month and it has the same name – is it possible to have the folder path created “on the fly” with the “month” as a sub-folder?
You just need to add that logic in the Flow in that case. Once the file is received, the flow gets triggered, then you can write additional actions in the Flow to check of a file with same name already exists and take actions accordingly. If you don’t find any action already available in Flow, you can always use SharePoint REST APIs to achieve the same. Take a look at https://anupams.net/sharepoint-rest-service-microsoft-flow/
What if i just want to copy the email to the list in SHarepoint, and it does not have an attachment?
This article is about Uploading documents to SharePoint document library.
If you want to upload the mail content to a list, you can read the subject, body etc. and create list items using List actions in Flow.
I am running into an issue with this when the file is a lager file. It is sometimes taking 30 minutes to an hour to process the file to process a file that is 36,000 kb. All help files point to it possibly being related to the type of license I have (O365 Enterprise). I am curious if someone has found a way to improve performance on larger files? Concurrency updates make it less performant.
36 mb doesn’t sound like that big a file. Is the performance better with smaller files? Maybe raise a ticket with Microsoft Flow team to get this troubleshooted. You can raise tickets with your O365 Enterprise License (if allowed by Global Admins) without any additional cost. I had compiled some information about Power Automate Limitations some time ago, take a look at this – Power Automate Limitations, now sure if these numbers are still valid though.
Hello,
I am using the PowerAutomate inside the Teams client. We would like to be able to have emails that come into our shared mailbox “inbox” moved to our Teams site/sharepoint site. I create the flow, but when I click save it doesn’t seem to actually save. When I go in then out of PowerAutomate, it no longer shows the newly created flow.