Most people working with various organizations are used to receiving nicely formatted newsletters/communications over email about various subjects like IT Security Updates, HR Updates or some know how about certain Applications. While bigger organizations may have a separate team(s) and specific tools to do so, in most small to medium organizations, this process remains ad-hoc and mostly manual. So, what about we help them with some simple to use tool to generate such templated emails much faster!
Problem Statement
Continuing from the Introductory statement, I have seen in smaller and medium sized organizations and even various groups within larger organizations, who want to share such newsletters/communications with targeted set of users, struggling to get the formatting of header, logo, content, images, footer etc. right every time. Wouldn’t it be nice, if they could fill in the details and images in a form and let some background process put things together in the desired format(s)? I know, they would love it! So, lets jump in and see what we can do about it.
What we are trying to achieve
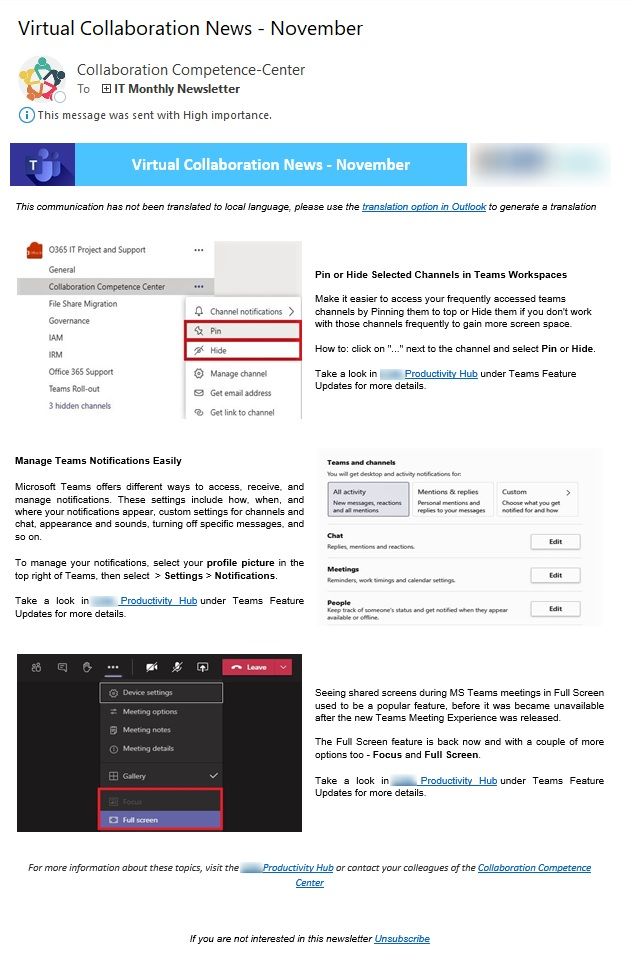
By the end of this article, we would want a solution which could generate a nice newsletter based on pre-formatted template(s). As an example, I’ll use this template, but you can use any other template you like.
Solution Summary
Before I start explaining all the nitty-gritties of the solution, let’s take at the outline first. So, our solution consists of the following components:
- Microsoft Outlook Client
- SharePoint List
- A publicly accessible storage like GDrive or WordPress
- A bit of Exchange Online
- Power Automate Flow
- And Optionally PowerApps
Let’s dig into the details now and see how all of these come together to create a WoW effect for such newsletter creators.
How to go about it
In this section, we’ll look into usage of each component in detail and see what part they play in our solution.
Create your mail Template
To get started, start with the template of the final in Outlook. This solution focuses more on rendering in outlook client as that’s still the norm to access emails and supports only a subset of css compared to web pages. You can either create a template in MS Word and paste those in Outlook, or create the entire template using Outlook Text Editing features – Using tables and putting relevant sections of images and texts as per your linking. You can also start with any email you might have received earlier in your mailbox and use that as a template.
Extract HTML from Template
Once you have finalized your mail template, open that in a separate outlook window and from under Message –> Actions –> Other Actions, select View Source
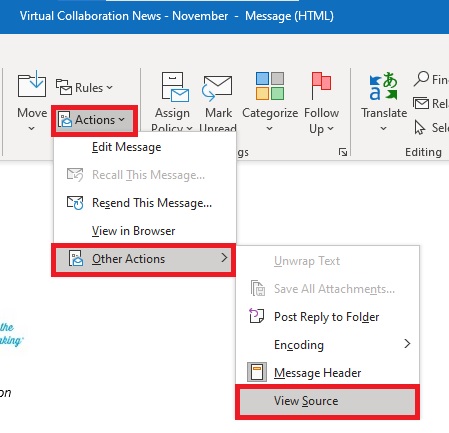
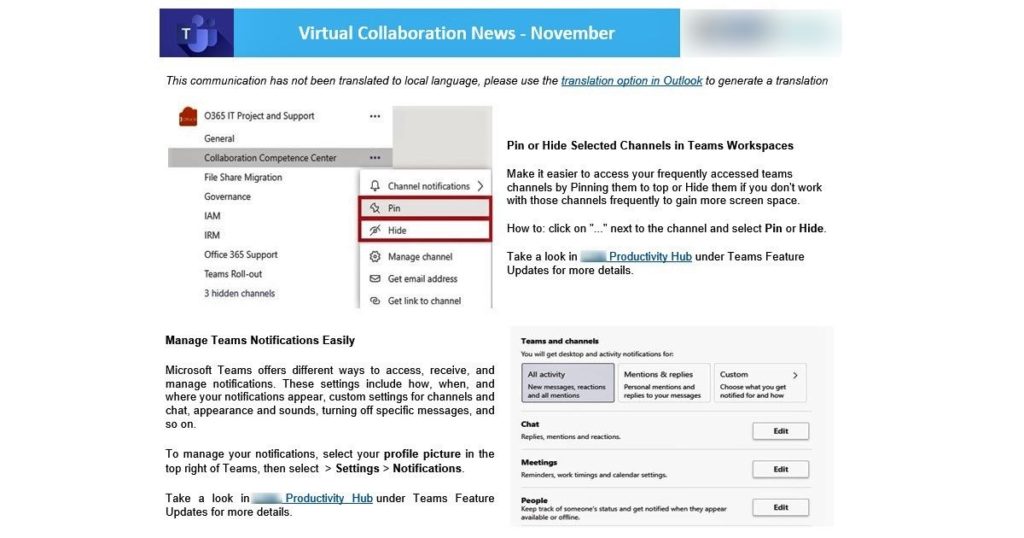
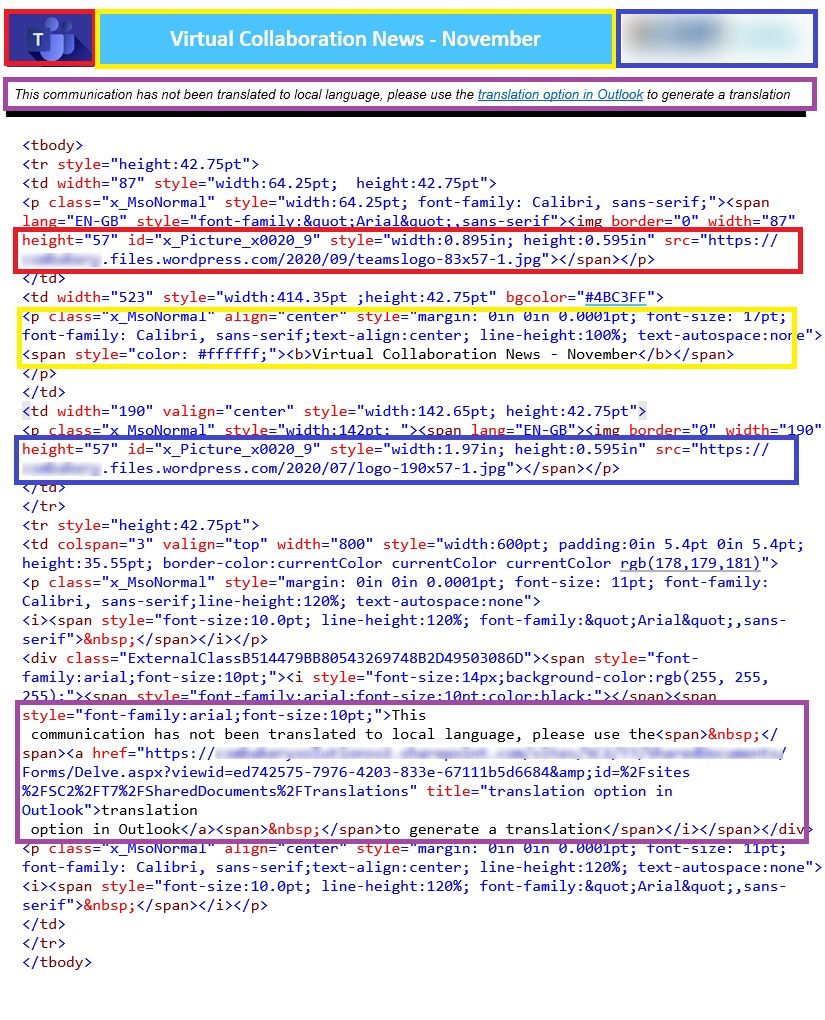
This will open the HTML view in a text editor. This HTML will serve as the base for our template. Open the HTML is an HTML editor and look for the images and content in various sections. In the image below, I have color coded the corresponding sections.
Do the same for rest of the content sections. And you got it right, using our tool we’ll make those sections dynamic which will replace images and text from the input provided by the creator while maintaining the layout of the template.
SharePoint List
A SharePoint list forms the basic front end (new and edit forms) and the main content storage. Create a SharePoint list in a site and add columns corresponding to the sections you want to make dynamic. For example, in the above template, there is an Application Logo, a title section, a company logo, a generic message about translation etc.
This is one sample structure of such a list.
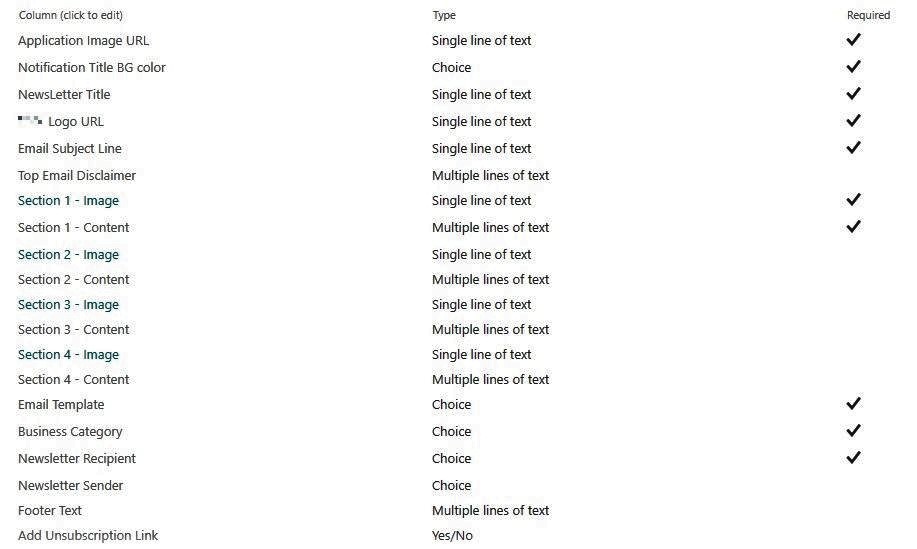
Let me explain some of these fields in the list.
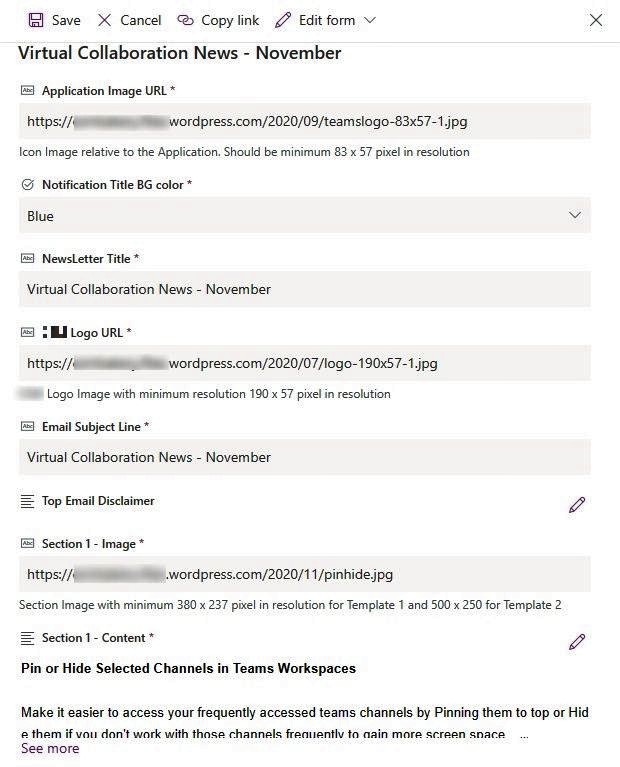
- Application Image URL: It’s the URL of the image which appears at top left, like the MS Teams logo in our template.
- Notification Title BG Color: This the background of the Newsletter title. By default, we have used blue color in our template, but we can make this configurable too. So if you want certain messages to have a different background color, you can do so
- Newsletter Title: It’s the text which will appear in the blue bar like “Virtual Collaboration News – November” in the previous template’s screenshot
- Logo URL: This is the URL of the company logo, which appears at top right corner of the title.
- Email Subject Line: Subject of the email received by recipients
- Top Email Disclaimer: This is to render some common message right after the header like “This communication has not been translated to local language, please use the translation option in Outlook to generate a translation” in our template.
- Section 1 to Section 4 Image: These 4 fields will contain the URLs of the corresponding images. As you can see in the template we are using for this article, we have the structure like Image and then some content and that repeats with Image and content moving left to right and vice versa.
- Section 1 to Section 4 Content: Same as previous explanation. These fields will contain the content corresponding to those images.
- Email Template: This is to support multiple email templates. You can add all available templates as choices here and let the creator select the desired one.
- Business Category: This column is more for governance purposes. Just a metadata to capture, so that in future you can generate a report like the newsletter was generated by which department. You can skip this one, if you don’t find it relevant.
- Newsletter Recipient: I have used a choice column to selectively add the Distribution lists to be added, but based on your requirement, you can very well make this as a Person or Groups type of column.
- Newsletter Sender: I have added a choice column to add the sender email IDs. Our service account which will be sending the emails, needs to have “Send As” permissions given in all these senders’ accounts. I will explain this when explaining Exchange part later.
- Footer Text: Any message or links that you may want to put after all the mail content like “For more information about these topics, visit the Productivity Hub” in our template.
- Add Unsubscribe Link: It’s a Yes/No column to show an Unsubscribe link at the bottom of the newsletter. We’ll need additional implementation logic to make that feature actually work.
That’s it about SharePoint list preparation for now. Let’s setup other components.
A publicly accessible storage
For this solution to work, all image files need to be stored in a location which allowed anonymous access. For this example, I am using a wordpress.com blog site, where I upload all the required images. You can get one created Free for you and it allows upto 3GBs of free storage. You can also use GDrive or any other such storage.
The point is that I have not automated that part, so newsletter creators need to upload their images manually in such locations and then add the URLs in our SharePoint list. However, it is possible to automate this part as well, using APIs of those storage providers. But that’s a subject for another day.
When using wordpress site for this purpose, you can even create additional accounts for newsletter creators to access and upload images using their own credentials.
Exchange Online
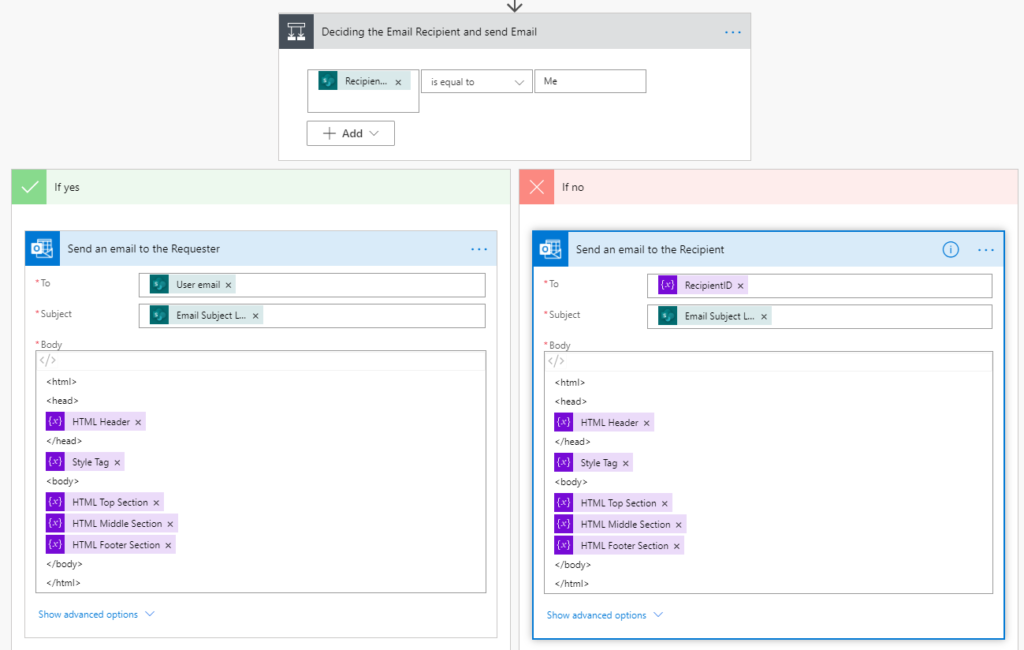
I used a specific service account in Power Automate to send the final generated newsletter over email, but all the recipients are supposed to see the actual sender which is provided in the list in the “Newsletter Sender” field, instead of this service account. To make this happen, you need some help from your Exchange Online Administrator.
Suppose the Actual sender is supposed to be “Collaboration Competence Center” or say [email protected] and the service account you are using in Power Automate Send Email action is [email protected]. In this case, your Exchange Admin needs to go to Exchange Online Admin Center, search for the [email protected] mailbox and add [email protected] as a delegate to allow Send As.

Once this is done, we can use “Send As” feature of Send Mail action in Power Automate Flow to send mails on behalf of actual sender and Recipients will only see the actual sender and not the service account which actually is sending the mail.
Power Automate Flow
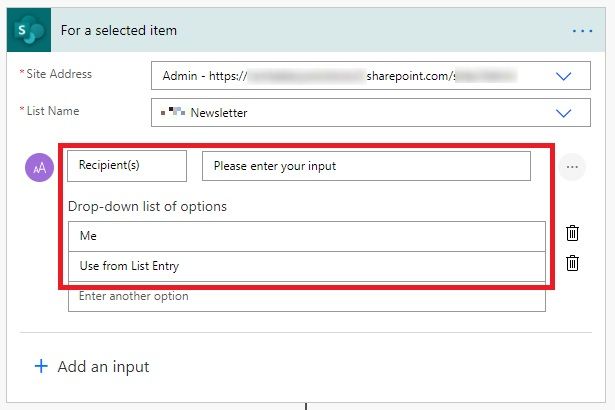
And Finally to actually put everything together, we will use a Power Automate Flow. The idea is that the newsletter creator adds an entry in the SharePoint list and then starts the Power Automate Flow manually. So, we start with the trigger – “For a selected Item” and to keep it easy to test, added a custom Input with a couple of options. If the creator selects “Me”, then the Flow ignores the recipient entry in the list and just sends the generated newsletter to the logged in user.
Now, Read the item from SharePoint list and Initialize various variables to contain the corresponding values. I am not showing all the variables here, but you get the idea.
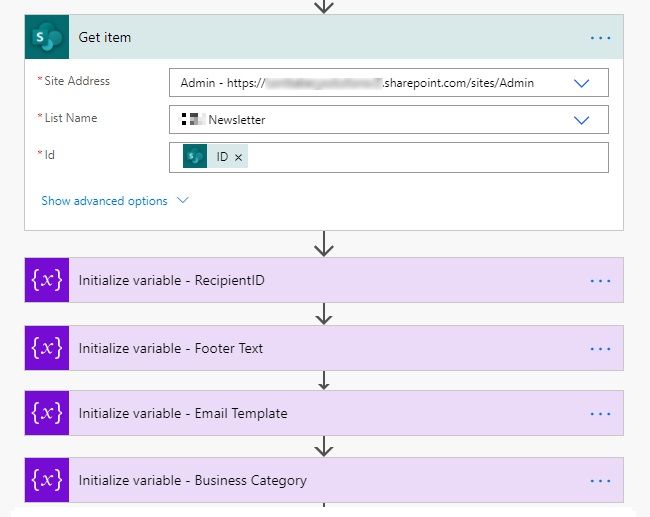
Since our template contains different sections consisting on an Image and a text area, and as you can see in the list settings, only Section 1 is mandatory, so, I am reading the content as an array, you can choose to created different variables for each of the content and image though.

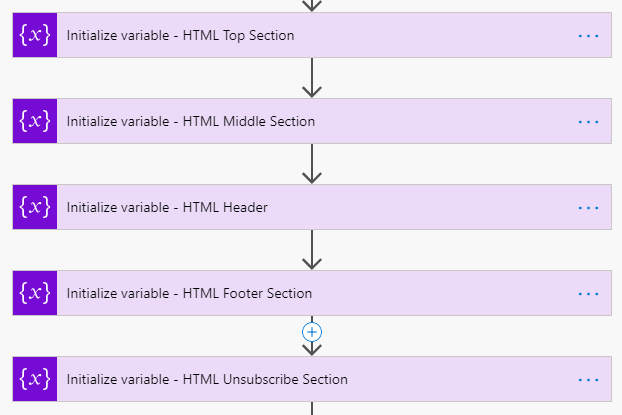
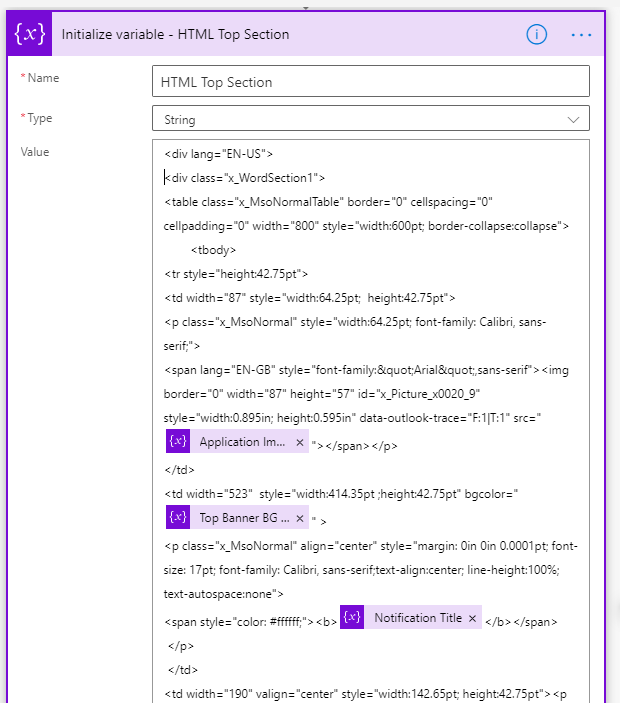
Create separate variables to store the split of the HTML like Top section, Header, Footer and So on.
You can then copy the relevant part of the HTML from the extracted HTML construct the individual sections by replacing hard coded texts and Images by the values in these variables.
For Example, look at how the HTML Header is constructed by replacing the values with the variables. You can do this for other sections similarly.
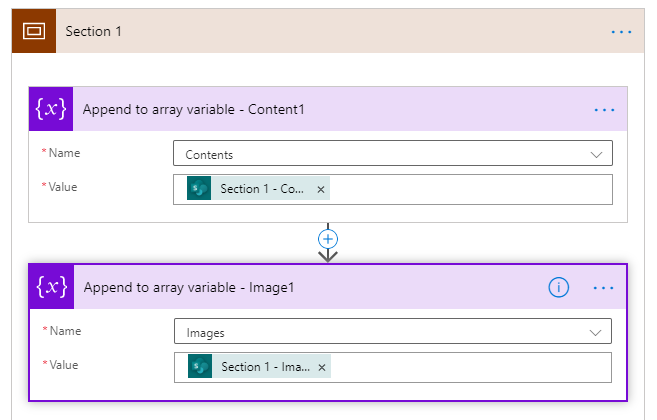
For the main content in the middle section, In my case, I am just appending the arrays with values from the list of Section 1 Image and Section 1 content, since that’s mandatory.
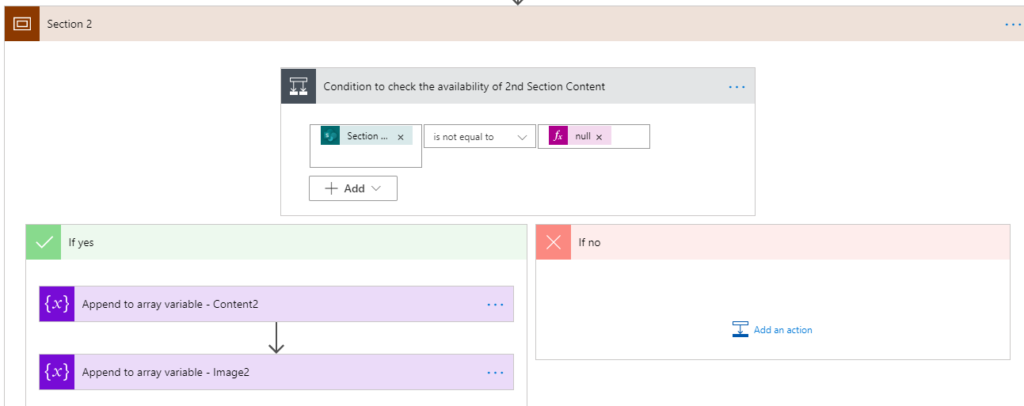
And for other sections, I am first checking whether the creator provided any value, if yes, then append those in the arrays as well.
At this stage, I have all my content sections filled with the actual Images and Texts provided by the creator in the list.
Next part is a bit tricky because of the template we selected. We need to loop through this Array and put the Image and Text combination, either at left side Image, Right side Text and Right side Image, Left side Text alternatively.
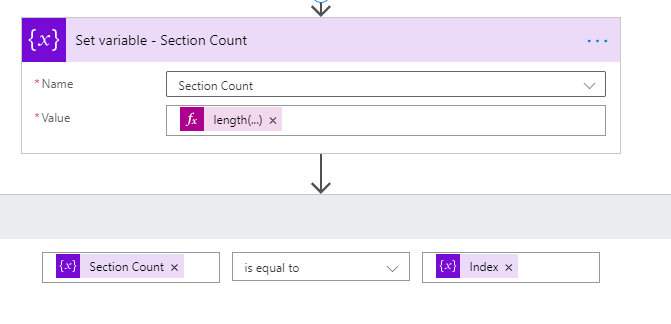
So, we find out how many items are already in the array, as only Section 1 is mandatory, and put a do while loop.
And let’s design the middle section by replacing the image and text with the array variable, passing the current index. I am using a mod formula to check whether to put items on left or right.
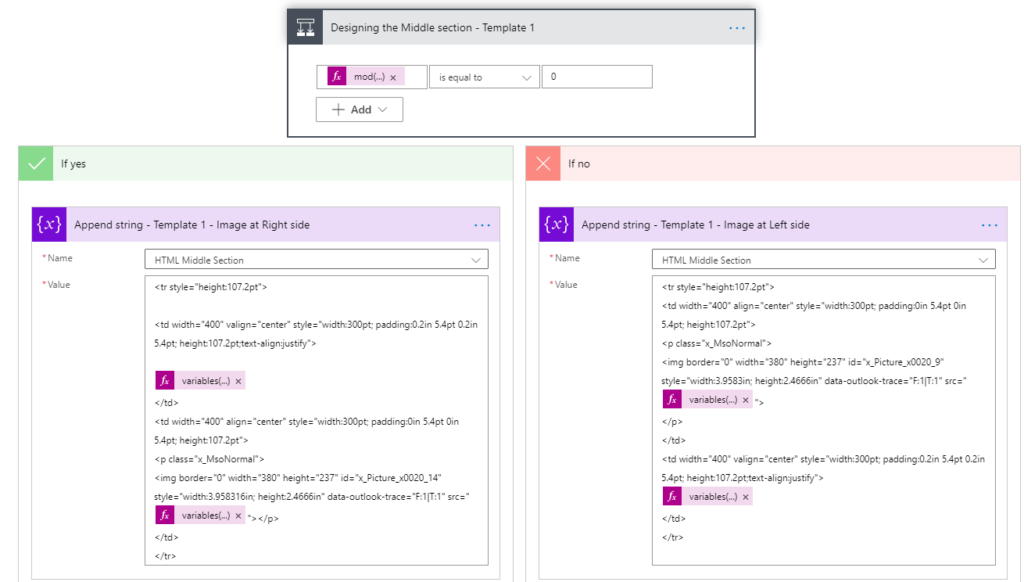
Once this is done, prepare the email, by combining the variable we used earlier.
Remember, I have not added screenshot of all the variables used in the solution, but you get the idea. As mentioned earlier, all I am doing here is to split the HTML into various variables like Header, Content, Footer etc. and replace their values dynamically by reading from the list.
You can easily support multiple templates by putting a Switch on Template field and generating a differently looking content part whereas the Top and bottom sections remain the same.
Running the Flow
Once the Flow is ready, make an entry in the list by providing all the Image URLs and desired textual content.
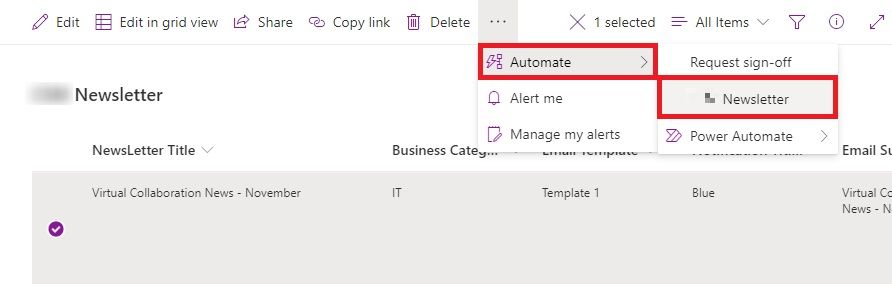
Select it and click on the Flow name from under Automate
It the Start flow screen, select the recipient as either “Me” or “Use from List Entry” and click on Run flow
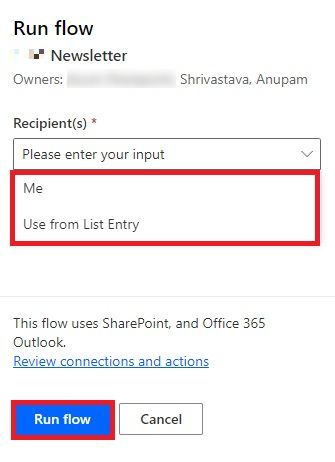
If everything goes well, the selected recipient(s) will receive a nicely formatted newsletter 🙂
What about PowerApps
I mentioned earlier that we can, optionally, use PowerApps in this solution. Well, that can come handy if you want to share this solution with multiple internal departments who use the same list and same new/edit forms. Using PowerApps, we can restrict who can edit what and which DLs are visible to whom, so that they don’t accidently update or send mails to unintended DLs.
And that’s it. Give it a try, let me know how it went for you.
Enjoy,
Anupam